
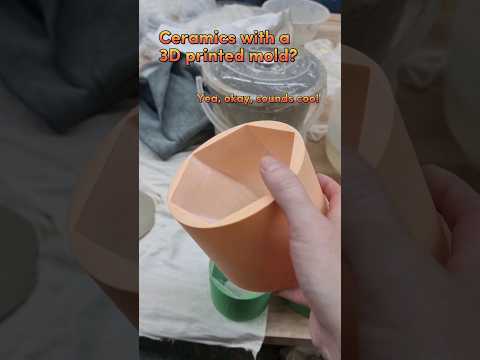
3D printing a ceramic mold is like blending the ancient art of pottery with the cutting-edge world of technology. It opens up a whole new realm of possibilities for shapes and designs. Let’s break down the steps and sprinkle in some helpful tips.
Step 1: Designing Your Mold

Interface to Tinkercad, drag and drop interface make it quick and easy!!!
Think of it like playing with digital Lego blocks. You’ve got these basic geometric shapes, right? Just click them together to build whatever you’ve got in your mind. There’s none of that headache with complicated menus or tools that make you scratch your head. Tinkercad keeps it straightforward and fun. It’s all about getting creative without getting bogged down in the technical stuff.
- Tip: Start with a clear design in a 3D modeling software. Precision here is key, as every detail will be replicated in your mold.
Let me tell you about Tinkercad! With my 35 years in the field, I’ve seen a lot of software come and go, but Tinkercad1 is a real game-changer, especially if you’re just starting out in 3D modeling.
It’s free, it runs right in your browser, and it’s so user-friendly that anyone can jump in, regardless of their experience level. The drag-and-drop interface? It’s a breeze to use. Whether you’re a hobbyist or looking to develop some serious skills, Tinkercad is a fantastic starting point. Trust me, give it a go – you won’t be disappointed.
Here is a comparison table of popular modeling software and features:
| Feature | Tinkercad | Blender | Maya |
|---|---|---|---|
| Ease of use | Very easy | Moderate | Difficult |
| Learning curve | Short | Long | Long |
| Cost | Free | Free | Paid |
| Complexity of models | Simple | Highly complex | Highly complex |
| Features | Basic | Advanced | Advanced |
| Materials | Limited | Custom | Custom |
Step 2: Choosing the Right Material
Let me break it down for you about PLA. It’s your go-to for mold making. First off, PLA is everywhere. It’s like the bread and butter of 3D printing filaments. Walk into any store, or a quick online search, and bam, there’s PLA in all colors, brands, you name it. It’s like the convenience store of filaments.
- Pointer: For 3D printing molds, you’ll want a material that can withstand the plaster pouring and setting process. ABS or PLA are common choices.
Now, let’s talk user-friendly. PLA? It’s like the forgiving friend who never lets you down. Low warping means your molds come out looking sharp, not like they’ve been through a funhouse mirror. Plus, it prints cool, literally. Lower temperatures mean your 3D printer isn’t sweating bullets.
And the cherry on top? It’s easy on the wallet. We’re talking $20-30 for a quality roll. While other materials like ABS or nylon might have you breaking the bank, PLA keeps things affordable. Trust me, in my 35 years, I’ve seen it all, and PLA is the smart, budget-friendly choice for mold making.
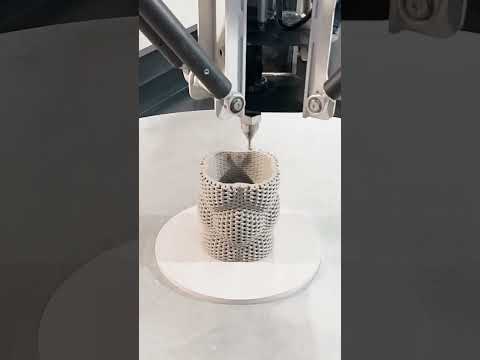
Step 3: 3D Printing the Mold
- Tip: Ensure your 3D printer settings are optimized for the material and design complexity. You want a smooth finish to avoid blemishes on the mold surfaces.
Alright, let’s talk about prepping your mold for casting, a crucial step. Once that mold comes out of the printer, it’s not quite ready to meet the clay. You’ll want to give it a bit of TLC. A good sanding or smoothing does wonders, making sure the surface is as slick as a whistle. Why? Well, you want your clay to come out looking sharp, not like it’s got a bad case of bed head.

And here’s another pro tip: don’t skip the mold release agent. It’s like the non-stick cooking spray of mold making. A little spritz and your clay won’t cling to the mold like gum on a shoe. Believe me, it saves you a lot of headaches down the line. Getting the mold right is half the battle won, and with these tricks up your sleeve, you’re set for success.
Step 4: Preparing the 3D Printed Mold for Casting
- Pointer: Clean any residue or strings from the 3D print. Apply a sealant if necessary to prevent plaster from sticking.
Step 5: Casting the Plaster into the Mold
- Tip: Mix your plaster to the right consistency and pour it into the 3D printed mold. Tap to remove air bubbles.
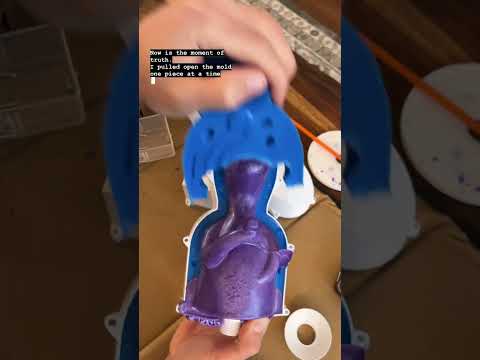
Step 6: Removing the Plaster Mold
- Pointer: Once the plaster sets, carefully remove the 3D printed part. This might require some gentle prying and patience.
Step 7: Finishing Touches on the Plaster Mold
- Tip: Sand any rough edges. Your plaster mold is now ready for slip casting or pressing clay.
Tips for Success
Alright, let’s dive into what you need to keep in mind when you’re diving into mold making with a 3D printer.
First up, know your printer’s limits. It’s like knowing how much weight you can lift. Your mold’s size and how fancy you can get with the design depends a lot on what your printer can handle. Don’t expect to print a cathedral if your printer can only handle a birdhouse, you know?
Next, let’s talk materials. Not all 3D printing filaments are cut out for mold making. You need a filament that’s like a tough cookie, one that can handle the heat and not get all mushy with moisture during the casting process.
And here’s the last piece of the puzzle: post-processing. When your mold pops out of the printer, it’s not going to be red-carpet ready. You’ll need to put in some elbow grease, maybe a bit of sanding or smoothing, to get it just right.
Design Complexity
- Tip: Consider the limitations of both 3D printing and plaster casting when designing your mold. Overly complex designs may be difficult to cast.
Mold Release Agents
- Pointer: Use a mold release agent on your 3D printed mold to make demolding the plaster easier.
Testing and Iteration
- Tip: You might not get it perfect on the first try. Be prepared to iterate on your design based on how the first casting turns out.
Safety First
- Pointer: Always follow safety guidelines for both 3D printing and handling materials like plaster.
Combining 3D printing with ceramic mold making is an exciting venture. It allows for precision and creativity in ways traditional methods can’t match. Remember, this is a learning process, so embrace the trial and error. Have fun!


Footnotes
- https://www.researchgate.net/figure/nterface-of-the-CAD-program-Tinkercad_fig1_353204372 ↩︎


