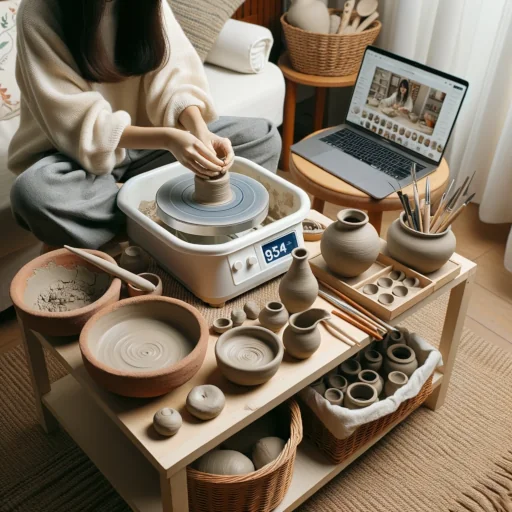
Yes, you absolutely can! Starting pottery at home is a feasible option for those who prefer a more flexible learning environment. All you need are some basic tools like a pottery wheel, kiln, and clay. Many beginners opt for mini electric pottery wheels and small kilns that are suitable for home use. You can also start with hand-building techniques that require minimal equipment. Online tutorials and courses make it easier to learn at your own pace. However, it’s important to consider the space you’ll need, as pottery can be messy. Safety precautions, like proper ventilation for the kiln, are also essential.
Best Way
Choose the Right Pottery Space:
Select a well-ventilated area in your home that’s easy to clean. Pottery can be messy, so a space with a hard floor is ideal.
Start with Basic Pottery Tools:
- Pottery Wheel: A tabletop wheel is sufficient for beginners.
- Kiln: A small, electric kiln can be used for firing your pottery.
- Hand Tools: Basic shaping tools, brushes, and sponges.
Select Your Clay:
Earthenware clay is great for beginners due to its low firing temperature and ease of use.
Learn Basic Techniques:
Start with hand-building techniques like pinching, coiling, and slab building. These don’t require a wheel and are great for understanding clay behavior.
Online Tutorials:
There are numerous online platforms like YouTube, Udemy, and Skillshare that offer beginner courses in pottery.
Safety First:
- Ventilation: Ensure good airflow in your workspace, especially if you’re using a kiln.
- Protective Gear: Use safety goggles, masks, and gloves.
Practice, Practice, Practice:
Consistency is key. The more you practice, the better you’ll get.
Join Online Communities:
Engage with other pottery enthusiasts online to share tips, get feedback, and stay motivated.
How to Find the Right Pottery Clay for Your Projects
Understanding Clay Types
Different types of clay have varying characteristics that make them suitable for specific projects. Here are some common types:
- Earthenware: Soft and easy to work with, ideal for beginners. It has a low firing temperature but is less durable.
- Stoneware: Harder than earthenware and requires a higher firing temperature. It’s durable and ideal for functional pieces like dinnerware.
- Porcelain: A very fine, white clay that requires the highest firing temperature. It’s best for advanced projects due to its delicacy.
- Raku: Specifically designed for a unique firing process called Raku firing. It has a low firing temperature and is often used for decorative pieces.
Factors to Consider
- Project Type: Functional pieces may require a more durable clay like stoneware, while decorative items can be made from softer clays like earthenware.
- Firing Temperature: Make sure your kiln can reach the required temperature for the clay you choose.
- Texture: Some clays have added grog or sand for texture, which can be desirable for certain projects.
Different Techniques Used to Create Pottery
Hand-Building Techniques
Mastering Hand Building Techniques and Tips1.
Pinching
This is one of the most basic forms of hand-building techniques. A ball of clay is shaped by pinching it between your fingers and thumb. It’s an excellent method for making small pots and decorative pieces.
Coiling
In this technique, long coils of clay are layered to build the walls of a pot. The coils are then smoothed to create a uniform surface. This method is often used for creating larger, more intricate pieces.
Slab Building
Flat pieces of clay, known as slabs, are joined together to form a structure. This technique is commonly used for making boxes, frames, and other geometric shapes.
Wheel Techniques
Throwing
Throwing is the process of shaping clay on a pottery wheel. The clay is centered on the wheel and then shaped into a vessel using your hands. This technique requires a good understanding of clay behavior and is often used for creating symmetrical pieces like bowls and vases.
Wheel-Throwing
Wheel-throwing is a more advanced form of throwing. It involves using the wheel to create more complex shapes and designs. For example, you might throw a basic shape on the wheel and then alter it by adding handles, spouts, or decorative elements.
Trimming
This is often the final step in wheel techniques. Once the thrown piece has slightly hardened, it’s placed back on the wheel for trimming. Excess clay is removed to refine the shape, and a foot may be added to the bottom of the piece.
Specialized Techniques
Raku Firing
This is a unique firing process that involves removing the pottery from the kiln while it’s still hot and placing it into a container with combustible materials. The result is a unique, crackled finish.
Sgraffito
In this decorative technique, a layer of slip (liquid clay) is applied to the pottery piece. Designs are then scratched into the slip to reveal the clay underneath.
Glazing
Glaze is applied to the pottery to add color, texture, and a glass-like surface. The glaze also makes the pottery more durable and waterproof.
Steps Involved in Pottery Making
Step 1: Preparation
Before you start, make sure you have all the necessary tools and materials. This includes clay, a pottery wheel if you’re throwing, hand tools, and a kiln for firing.
Step 2: Wedging the Clay
This is the process of kneading the clay to remove air bubbles and prepare it for shaping. It ensures uniform consistency and helps in easier molding.
Step 3: Forming the Pot
Hand-Building
- Pinching: Start with a ball of clay and pinch it into shape.
- Coiling: Roll out coils and layer them to form the walls.
- Slab Building: Create flat slabs of clay and join them.
Wheel Techniques
- Throwing: Center the clay on the wheel and shape it using your hands.
- Wheel-Throwing: Create complex shapes by altering basic forms made on the wheel.
Step 4: Drying
Once the pot is formed, it needs to be left to dry until it reaches a ‘leather-hard’ stage. This is crucial for trimming and adding details.
Step 5: Trimming and Adding Details
At the leather-hard stage, you can trim away excess clay and add handles, spouts, or decorative elements.
Step 6: Bisque Firing
The pot is first fired at a lower temperature to remove all the moisture. This is known as bisque firing, and it prepares the pot for glazing.
Step 7: Glazing
After the bisque firing, a glaze is applied to the pot. This can add color, texture, and a glass-like surface to the piece.
Step 8: Glaze Firing
The glazed pot is then fired at a higher temperature to melt the glaze and fuse it to the clay, creating a durable and waterproof surface.
Step 9: Cooling and Unloading
After the glaze firing, the kiln is allowed to cool before the finished pot is removed. It’s crucial to wait until the kiln has cooled to room temperature to avoid thermal shock, which could crack the pottery.
Step 10: Final Inspection
The final step is to inspect your pottery for any imperfections or cracks. If everything looks good, your pottery piece is complete and ready for use or display!
Budget Pottery Wheels for Beginners
Yes, there are budget-friendly pottery wheels available specifically designed for beginners. These wheels are often smaller, more portable, and less feature-rich than professional models, but they are perfect for learning the basics of pottery. Here are some options to consider:
Tabletop Pottery Wheels
These are compact and can easily fit on a table or countertop. They are perfect for small projects and are usually priced under $300.
Mini Electric Pottery Wheels
These are battery-operated or plug-in models that are highly portable. They are great for small projects and can cost as low as $100 to $200.
Second-Hand Pottery Wheels
You can often find used pottery wheels at a fraction of the cost of new ones. Websites like eBay, Craigslist, or local classifieds are good places to look.
DIY Pottery Wheels
If you’re handy, you can build your own pottery wheel using household items like a bucket and a ceiling fan motor. There are numerous tutorials online that can guide you through the process.
Leasing Options
Some pottery supply stores offer leasing options for pottery wheels, which can be a cost-effective way to get started without committing to a purchase.
Things to Consider
- Weight Capacity: Make sure the wheel can handle the amount of clay you plan to use.
- Speed Control: Look for wheels with variable speed settings for better control.
- Durability: Even if you’re on a budget, make sure the wheel is well-constructed to ensure it lasts.
Alternatives to Electric Kilns for Home Pottery
No, it’s not absolutely necessary to have an electric kiln when starting pottery at home. While electric kilns are convenient and offer precise temperature control, there are alternative methods for firing pottery that are more budget-friendly and space-efficient. Here are some options:
Pit Firing
This is one of the oldest methods of firing pottery. A pit is dug in the ground, filled with combustible materials like wood and sawdust, and the pottery is placed inside. The pit is then set on fire and allowed to burn out. This method is best for low-fire clays like earthenware.
Raku Firing
This is a quick and dramatic firing process that involves removing the pottery from the kiln while it’s still hot and placing it into a container with combustible materials. It’s a fun and interactive way to fire pottery but is generally not suitable for functional pieces.
Gas Kilns
Propane-fueled gas kilns are another option. They are generally smaller and less expensive than electric kilns and can be used outdoors.
Oven Firing
Some air-dry clays can be baked in a conventional oven, although this is generally not recommended for pieces that need to be durable or food-safe.
Alternative Firing Services
Many community centers, art schools, and pottery studios offer kiln rental services. This can be a cost-effective way to fire your pottery without owning a kiln.
Things to Consider
- Type of Clay: Not all types of clay are suitable for alternative firing methods. Make sure to choose a clay that matches your chosen firing method.
- Safety: Always follow safety guidelines, especially when dealing with open flames or high temperatures.
- Functional vs. Decorative: Alternative firing methods may not produce pottery that is as durable or food-safe as electric kiln firing.
Components of an Ideal Clay Mix for Pottery
The composition of clay can significantly impact its workability, firing temperature, and the final characteristics of the pottery. An ideal clay mix for pottery generally consists of the following components:
Kaolinite
Kaolinite is a type of clay mineral that provides plasticity, making it easier to shape the clay. It also contributes to the clay’s whiteness after firing.
Ball Clay
Ball clay adds plasticity to the mix and improves workability. It is usually darker in color and fires to a lighter shade. It’s often used in combination with kaolinite to balance the clay’s properties.
Feldspar
Feldspar acts as a flux, lowering the melting point of the clay and helping it to vitrify during firing. This results in a stronger, more durable final product.
Quartz (Silica)
Quartz provides structure to the clay body and helps to prevent warping during drying and firing. However, too much quartz can make the clay less workable.
Talc
Talc is often added to low-fire clay bodies to increase thermal expansion, making the clay more suitable for specific glaze fits.
Grog
Grog is pre-fired clay that has been ground up into granules. It is added to clay bodies to reduce shrinkage and minimize cracking during drying and firing.
Organic Matter
Some clay bodies may include small amounts of organic matter like straw or paper pulp to improve workability and reduce cracking.
Additives
Various additives like oxides and stains can be included to alter the clay’s color, texture, or other properties.
Water
Water is essential for making the clay workable. The amount of water can affect the clay’s plasticity and drying time.
Considerations
- Firing Temperature: The mix should be compatible with your intended firing temperature.
- Workability: The clay should be easy to work with, neither too sticky nor too dry.
- End Use: The ideal mix may vary depending on whether you’re making functional ware, sculptures, or other types of pottery.
Creating Round Ceramic Ware at Home Without Expensive Equipment
Creating round ceramic ware at home doesn’t necessarily require expensive equipment like a pottery wheel or kiln. Here are some budget-friendly methods to help you craft beautiful round pottery2.
Pinch Pots
- Start with a Ball of Clay: Take a lump of clay and roll it into a ball.
- Create a Hole: Press your thumb into the center of the ball to create a hole.
- Pinch and Turn: Use your thumb and fingers to pinch the walls while turning the pot to form a round shape.
- Smooth the Surface: Use a wooden spoon or your fingers to smooth the surface.
Coil Method
- Roll Coils: Roll out long, snake-like coils of clay.
- Build the Base: Create a flat circle for the base.
- Layer the Coils: Place the coils on the base, layering them on top of each other.
- Smooth the Coils: Use your fingers or a tool to blend the coils together, creating a smooth, round shape.
Slab Method
- Roll a Slab: Roll out a flat slab of clay.
- Cut a Circle: Use a round template to cut out a circle from the slab.
- Form the Sides: Cut a strip of clay and attach it to the edge of the circle, forming the sides.
- Seal the Edges: Use your fingers or a tool to seal the edges and create a round form.
Firing Alternatives
- Air-Dry Clay: If you don’t have access to a kiln, consider using air-dry clay, which hardens at room temperature.
- Oven-Bake Clay: Some clays can be baked in a regular kitchen oven.
- Community Kilns: Many local studios offer kiln services for a fee.
Finishing Touches
- Sanding: Once the piece is dry or fired, you can sand it to smooth out any imperfections.
- Painting: Use acrylics or special ceramic paints to decorate your piece.
- Sealing: Apply a sealant to protect the paint and add a glossy finish.
Tips for Beginner Potters Attempting Their First Project at Home
Pottery for beginners3.
Choose the Right Clay
Different clays have different properties and firing temperatures. Research and choose a clay that suits your project and available firing method.
Start Simple
Begin with a straightforward project like a pinch pot or a small bowl. Mastering the basics is crucial before moving on to more complex forms.
Gather Basic Tools
While specialized pottery tools are helpful, you can start with basic household items like a rolling pin, knife, and wooden spoons for shaping and smoothing.
Create a Dedicated Space
Pottery can be messy. Designate a specific area for your pottery work, even if it’s just a corner of a room, to keep things organized.
Test Your Glazes
If you’re using glazes, test them on small pieces first to see how they react with your clay and firing method.
Focus on Technique
Pay attention to the techniques you use for shaping, smoothing, and joining clay. Proper technique can make a significant difference in the final product.
Keep a Journal
Document your processes, types of clay, glaze formulas, and firing temperatures. This will help you replicate successes and learn from failures.
Dry Slowly
Rushing the drying process can lead to cracks. Allow your piece to dry slowly and evenly.
Safety First
Always read and follow safety guidelines for materials and equipment. Wear a mask when handling powders and ensure good ventilation if you’re firing at home.
Be Patient and Practice
Pottery is a skill that takes time to develop. Don’t be discouraged by initial failures; they’re a natural part of the learning process.
Safety Precautions for Beginner Potters Starting at Home
Safety should be a top priority when starting pottery at home. Here are some essential safety precautions that all beginner potters should consider:
Proper Ventilation
Ensure that your workspace is well-ventilated, especially if you’re using chemicals or firing clay at home. Fumes from certain materials can be harmful if inhaled.
Dust Control
Clay dust can be harmful when inhaled. Always wet-mop the floor and work surfaces to keep dust levels down. Consider wearing a dust mask when handling dry materials.
Chemical Safety
If you’re using glazes, be aware that some may contain toxic substances like lead or cadmium. Always read labels and safety data sheets, and use gloves when handling chemicals.
Fire Safety
If you’re using a kiln, make sure it’s in a well-ventilated area away from flammable materials. Keep a fire extinguisher nearby and be familiar with how to use it.
Electrical Safety
Ensure that any electrical equipment like kilns or pottery wheels are properly grounded. Avoid using electrical equipment near water to prevent shocks.
Tool Safety
Sharp tools like knives and needles can cause injuries. Always cut away from yourself and keep your tools clean and sharp to minimize the risk.
Personal Protective Equipment (PPE)
Wear appropriate PPE like safety goggles, gloves, and masks when necessary. For example, goggles can protect your eyes from flying clay particles.
Safe Storage
Store chemicals and tools safely out of reach of children and pets. Label all containers clearly to avoid confusion.
Ergonomics
Pay attention to your posture and take frequent breaks to prevent strain or injury. Consider using an adjustable chair and worktable to maintain a comfortable working position.
Cleanliness
Keep your workspace clean to prevent accidents like tripping over objects or slipping on wet floors.
Footnotes
- Cobb, Sunshine. Mastering Hand Building: Techniques, Tips, and Tricks for Slabs, Coils, and More. United States: Voyageur Press, 2018. ↩︎
- Stone, Francesca. Easy Homemade Pottery: Make Your Own Stylish Decor Using Polymer and Air-Dry Clay. United Kingdom: Page Street Publishing, 2021. ↩︎
- Pottery Book for Beginners: A Potter’s Guide to Sculpting 20 Beautiful Handbuilding Ceramic Projects Plus Pottery Tools, Tips and Techniques to Get You Started. N.p.: Garth Mullins, 2021. ↩︎


