
To glaze pottery, choose the right glaze, prepare the pottery, and apply the glaze in a smooth, even coat. Fire the pottery in a kiln to fuse properly the glaze to the clay body. Take safety precautions to avoid exposure to hazardous particles and dispose of glaze materials safely.
Get Your Glaze On!
I was taught its a technique used to add a layer of glass-like material to the surface of a piece of pottery, creating a smooth, durable, and often colorful finish. The glaze is applied to the pottery before it is fired in a kiln, and it undergoes a chemical transformation during firing, melting and fusing to the surface of the pottery to create a waterproof and durable coating.
Glazes are made from a variety of materials, including clay, silica, feldspar, and metal oxides, and they can be formulated in a wide range of colors, textures, and finishes. Glossy glazes create a shiny, reflective surface, while matte glazes have a more subdued, satin-like finish. Glazes can also be layered to create complex effects, such as a marbled or textured surface.
“Glazing pottery is a process of alchemy, transforming clay into a functional work of art.”
Ed Shears
Glazing pottery is an important part of the pottery-making process, as it not only adds aesthetic appeal to the pottery, but also enhances its functionality by making it waterproof and durable. Whether you’re creating functional dinnerware or decorative art pieces, glazing pottery is a key step in the process of transforming clay into beautiful and useful objects.
Why is it important in pottery making?
Glazing is an essential part of pottery making, as it serves several important functions. First and foremost, glazing pottery helps to create a waterproof and durable surface on the pottery. Without a glaze, pottery is porous and can absorb water, making it unsuitable for use as functional dinnerware or other items that come into contact with liquids.
Did you know that in addition to enhancing the functionality of pottery, glazing also adds aesthetic appeal to the finished piece. Glazes can be formulated in a wide range of colors, textures, and finishes, from glossy and reflective to matte and subdued. This allows potters to create pieces that are not only functional, but also visually stunning and expressive.
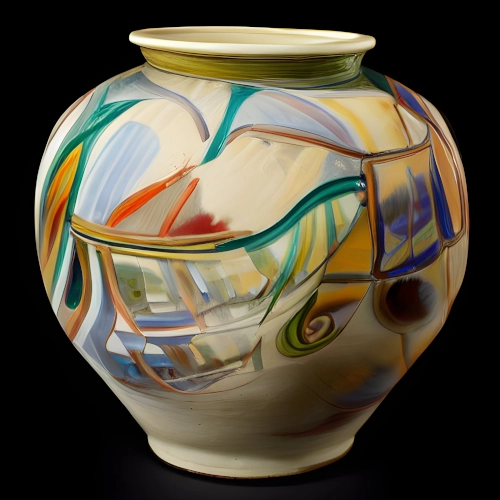
Mock up design by Ed
Glazing pottery provides a means of artistic expression and experimentation for potters. With so many different types of glazes and techniques available, potters can create a seemingly endless variety of surface textures, colors, and patterns on their pottery. Glazing can be used to create complex and intricate designs, or simple and elegant finishes, depending on the desired effect.
What are the benefits of glazing pottery?
Based on my experience there are many benefits to glazing pottery, both practical and aesthetic. One of the primary benefits of glazing is that it creates a waterproof and durable surface on the pottery. Without a glaze, pottery is porous and can absorb liquids, making it unsuitable for use as functional items like dinnerware, cups, or vases.
Another benefit of glazing is that it enhances the appearance of the pottery. Glazes can be formulated in a wide range of colors, textures, and finishes, from glossy and reflective to matte and subdued. This allows potters to create pieces that are not only functional but also visually stunning and expressive.
Glazing can add texture and dimension to pottery. By layering multiple glazes or using techniques like sgraffito or slip trailing, potters can create intricate designs and patterns on their pottery. This can give a unique look and character to each piece, making it stand out as a work of art.
I have found glazing pottery can help to preserve the integrity of the clay body, protecting it from abrasion, corrosion, and other forms of damage. This can help to ensure that the pottery lasts for years, retaining its beauty and functionality over time.
What are the different types of glazes?
There are many different types of glazes that I can use to achieve different effects on pottery. Here are some of the most common types of glazes I know about:
- The most common are glossy glazes. These glazes create a shiny and reflective surface on the pottery, giving it a polished and lustrous appearance.
- A little lesser known matte glazes. These glazes have a more subdued, satin-like finish, giving the pottery a softer and more natural look.
- Textured glazes. These glazes contain small particles or crystals that create a textured surface on the pottery, giving it a unique and interesting look and feel.
- Crackle glazes. These glazes create a network of fine cracks on the surface of the pottery, giving it a rustic and aged appearance.
- Opaque glazes. These glazes are often used to create solid colors or to cover up imperfections on the pottery.
- And of course clear glazes. These glazes do not contain any pigments or colorants and create a transparent, glass-like finish on the pottery.
- And last but not least underglazes. These glazes are applied under the surface glaze and
How do you choose the right glaze for your pottery?
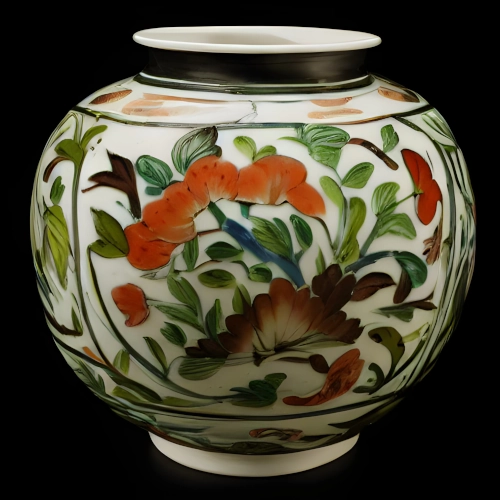
Mock up design
Choosing a glaze for pottery I think its important part of the pottery making process. Here are some factors I consider when choosing the right glaze for pottery:
- Consider the intended use of the pottery. If the piece is intended for functional use like dinnerware or vases, you will want to choose a glaze that is durable, non-toxic, and easy to clean.
- Different types of glazes are formulated to work at different firing temperatures. Make sure to choose a glaze that is compatible with the temperature range of your kiln.
- Some glazes work better with certain types of clay bodies. For example, high-iron glazes work well with dark clay bodies, while celadon glazes look best on porcelain or white stoneware.
- Consider the color and finish you want to achieve on your pottery. Do you want a glossy or matte finish? A solid color or a variegated look? Choose a glaze that will give you the desired effect.
- Some glazes are not compatible with each other and can produce undesirable results when layered. Make sure to test your glazes together before applying them to your pottery.
“Choosing the right glaze is like choosing the perfect outfit – it needs to complement the piece and bring out its best qualities.”
Meesh
What are the differences between glossy and matte glazes?
Mock up design matte glaze
In my experience glossy and matte glazes are two of the most common types of glazes used in pottery making. The main differences between glossy and matte glazes are their appearance and texture.
Glossy glazes create a shiny and reflective surface on the pottery, giving it a polished and lustrous appearance. They are often used to highlight the color and texture of the pottery, making it stand out and catch the eye. Glossy glazes tend to be smoother and more uniform in texture, and they reflect light, creating a bright and eye-catching finish.
Matte glazes, on the other hand, have a more subdued, satin-like finish, giving the pottery a softer and more natural look. They are often used to create a more understated or rustic appearance on the pottery, and they can be used to hide any surface imperfections or flaws. Matte glazes tend to have a rougher texture and do not reflect light, creating a more muted and subdued finish.
Both glossy and matte glazes have their own unique properties and can be used to achieve different effects on the pottery. Choosing the right glaze for your pottery will depend on the desired appearance and texture you want to achieve on your finished piece. Whether you choose a glossy or matte glaze, you can create beautiful and unique works of art that are both functional and visually appealing.
What are the benefits of using a clear glaze?
Here are my top reasons and benefits for using a clear glaze on pottery.
- Clear glaze can provide a protective layer on the surface of the pottery. This can help to prevent the pottery from becoming scratched, chipped, or damaged over time, as well as protect it from stains or discoloration caused by exposure to liquids or food.
- Clear glaze can make pottery more durable by increasing its resistance to abrasion, corrosion, and other forms of damage. This can help to ensure that the pottery lasts for years, retaining its beauty and functionality over time.
- Clear glaze can enhance the appearance of the pottery by giving it a glossy, glass-like finish that can make the colors and textures of the pottery more vibrant and expressive.
- Clear glaze can be used on its own or in combination with other glazes to create a wide range of effects and finishes on pottery. It can be used to create a glossy, transparent finish that shows off the natural beauty of the clay body, or it can be used to provide a protective layer over other glazes.
- Clear glaze is easy to use and apply, making it a popular choice for potters of all skill levels. It can be applied using a brush, sprayer, or dip method, and it can be fired at a variety of temperatures depending on the desired effect.
What tools and materials do you need to glaze pottery?
Glazing pottery requires a few basic tools and materials. Here is my general list of the tools and materials you might need.
- You will need the glaze itself. Can’t do much without the glaze!!! Glaze can be purchased in powdered form or premixed in liquid form.
- You will need a good quality brush to apply the glaze to the pottery. It is best to use a brush made specifically for glazing pottery, which has a soft bristle and a tapered edge.
- It is important to wear gloves when working with glaze to avoid skin irritation and to keep the glaze off your hands.
- You should wear a dust mask to avoid inhaling any glaze particles that may be present in the air.
- Once the glaze has been applied, the pottery needs to be fired in a kiln. The kiln should be properly calibrated to ensure that it reaches the correct temperature for firing the glaze.
- You will need kiln furniture to support the pottery during firing. This can include shelves, posts, and stilts.
- You will need tools to clean the pottery before applying the glaze, such as a sponge, water, and a cleaning solution.
- It is a good idea to wear protective clothing, such as an apron or smock, to protect your clothes from glaze spills and splatters.
How do you prepare your pottery for glazing?

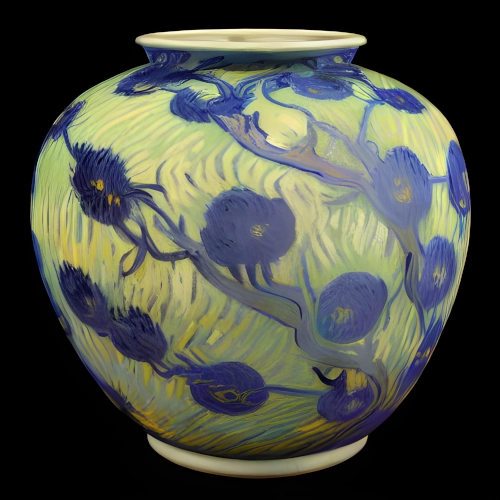
Mock up design by Ed
Based on my experience properly preparing your pottery for glazing is essential to ensure that the glaze adheres properly and the finished piece turns out as desired.
- Make sure the pottery is free from any dirt, debris, or oil that could interfere with the glaze adhesion. You can clean the pottery using a sponge or cloth and a cleaning solution.
- Allow the pottery to dry completely before applying the glaze. This can be done by leaving the pottery out to air dry or by using a hairdryer or heat gun.
- Use sandpaper or a sanding sponge to smooth any rough spots or imperfections on the pottery’s surface. This will ensure that the glaze adheres evenly and gives a smooth finish.
- Using a brush, dip, or spray method, apply the glaze to the pottery in thin, even layers. Make sure to cover the entire surface of the pottery and avoid leaving any drips or bubbles.
- Allow the glaze to dry completely before firing the pottery. This can take several hours or overnight depending on the type of glaze used.
What are some common mistakes to avoid when glazing pottery?
I know that glazing pottery can be a tricky process, and there are a few common mistakes that beginners and evne experienced potters alike should avoid.
- Applying too much glaze, yes, I am guilty of this one! Applying too much glaze can result in drips and runs, which can ruin the piece. Always apply glaze in thin, even coats.
- Not cleaning the pottery properly can result in the glaze not adhering properly. Make sure to thoroughly clean the pottery before applying the glaze.
- Not allowing the pottery to dry completely before applying the glaze can result in uneven application and bubbles. Make sure the pottery is completely dry before applying the glaze.
- Firing the pottery at the wrong temperature can cause the glaze to melt too much or not enough, resulting in an undesirable finish. Make sure to fire the pottery at the correct temperature for the glaze being used.
- Overfiring or underfiring the pottery can also affect the glaze finish. Make sure to follow the instructions for the specific glaze being used and fire the pottery at the correct temperature and duration.
“A smooth, even coat of glaze is like a fresh layer of paint on a canvas, bringing the piece to life and adding depth and character.”
Ed Shears
How do you apply glaze to pottery?
Oh yes, now come the fun part! There are several methods for applying glaze to pottery, including brushing, dipping, and spraying. There maybe others but these are the methods I am familiar with.
Brushing
This is the most common method for applying glaze to pottery. You will need a good quality brush to apply the glaze in thin, even coats. Start by applying the glaze to the edges and corners of the piece, and then work your way inward. Make sure to avoid leaving brush marks or drips.
Dipping
This method involves dipping the pottery into a glaze bucket to coat the entire piece. This method is best suited for simple, symmetrical pieces. Make sure to hold the piece by the foot or base to avoid leaving fingerprints on the glaze.
Spraying
This method involves using a spray gun or airbrush to apply the glaze to the pottery. This method is best suited for larger pieces or pieces with intricate designs. Make sure to apply the glaze in thin, even coats and to avoid overspraying.
What are the different techniques for glazing pottery?
Design by Ed
There are many techniques for glazing pottery, each producing different effects and finishes. Here is my list of the most common techniques:
- Single glaze your pottery. This involves applying one glaze to the entire piece. This is the simplest and most common technique.
- Layering your glaze. This involves applying multiple layers of different glazes to create depth and texture.
- Wax resist: This technique involves applying a wax resist to certain areas of the pottery before glazing to create a contrast between the glazed and unglazed areas.
- Sgraffito technique. This involves carving or scratching a design into the glaze before firing to create texture and contrast.
- Brushworking your glaze. This involves using a brush to paint designs or patterns onto the glaze before firing.
- Pouring glaze. This involves pouring glaze over the pottery to create a random and organic pattern.
- Stenciling. This involves using stencils to create precise designs on the glaze.
- And Mishima. This involves carving a design into the pottery and filling it with a contrasting glaze color.
How do you layer glazes to achieve different effects?
I have found layering glazes can create beautiful effects and textures on pottery.
- Choose two or more glazes that work well together and that will create the desired effect when layered.
- Apply the first glaze to the pottery in a thin, even layer. Allow the glaze to dry completely.
- Apply the second glaze over the base glaze in a thin, even layer. The second glaze should be applied more thinly than the base glaze to allow it to show through.
- Repeat the layering process with additional glazes, if desired.
- Experiment with different layering techniques, such as blending or feathering, to create unique effects.
- Test fire the pottery to ensure that the glazes react well together and to see the final effect.
What are some tips for achieving a smooth, even coat of glaze?
I have found through the years achieving a smooth, even coat of glaze can be a challenge for potters, but there are several tips and tricks that can help.
- Make sure the pottery is clean and free of dust or debris before applying the glaze. Any imperfections or debris can affect the final finish.
- Stir the glaze thoroughly before use to ensure that it is well mixed and any settling is evenly distributed.
- Apply the glaze in thin, even coats using a good quality brush or other application method. Avoid applying too much glaze at once, which can lead to runs or drips.
- Allow each coat of glaze to dry completely before applying the next coat. This will prevent the glaze from becoming too thick or uneven.
- If desired, lightly sand the pottery between coats of glaze to ensure a smooth, even finish.
- Check for bubbles in the glaze and gently tap the pottery to release any trapped air.
- Fire the pottery at the correct temperature for the specific glaze being used. This will ensure that the glaze melts and flows evenly.
How do you fire pottery after glazing?
After glazing, pottery needs to be fired in a kiln to fully cure the glaze and achieve the desired finish.
- I advise arranging the pottery in the kiln, making sure that the pieces are spaced evenly and that the glaze will not touch any other pieces during firing.
- Make sure the kiln is well-ventilated and that the vent is open to allow air flow during firing.
- Begin heating the kiln slowly, gradually increasing the temperature over a period of several hours. This is called the “firing schedule.”
- Once the kiln reaches the target temperature, hold it at that temperature for the recommended amount of time. This will allow the glaze to fully cure and melt.
- After the recommended hold time, begin cooling the kiln slowly, gradually decreasing the temperature over a period of several hours. This is called the “cooling schedule.”
- Once the kiln has cooled completely, remove the pottery from the kiln and inspect it for any defects or imperfections.
What temperature should you fire your pottery at?
The temperature at which pottery should be fired depends on the specific type of clay and glaze being used. Each type of clay and glaze has a recommended firing temperature range that is necessary to achieve the desired result.
For example, earthenware clay is typically fired between 1,000 to 1,150 degrees Celsius (1,830 to 2,100 degrees Fahrenheit), while stoneware and porcelain clays are typically fired between 1,200 to 1,300 degrees Celsius (2,200 to 2,400 degrees Fahrenheit).
“Firing pottery after glazing is like baking a cake – it’s all about the right temperature and timing to get the best results.”
Ed Shears
Similarly, glazes have their own recommended firing temperature ranges. Some glazes can be fired at low temperatures, while others require higher temperatures to fully mature and achieve the desired finish. The recommended firing temperature range for each glaze should be listed on the label or in the manufacturer’s instructions.
What are pyrometric cones and how do you use them?
Pyrometric cones are small, pyramid-shaped devices made of ceramic materials that are used to measure the temperature inside a kiln during firing. Pyrometric cones are designed to bend or melt at specific temperatures, which allows potters to determine whether the kiln has reached the desired firing temperature for the specific clay and glaze being used.
Here are my steps for using pyrometric cones.
- Select the appropriate pyrometric cones for the specific clay and glaze being used, based on the recommended firing temperature range.
- Place the pyrometric cones inside the kiln, near the pottery being fired, so that they can be easily seen through a peephole or the kiln’s viewports.
- Fire the kiln according to the recommended firing schedule, monitoring the temperature and the pyrometric cones as the kiln heats up.
- Monitor the pyrometric cones during firing to see if they begin to bend or melt. When the cones bend or melt to a specific degree, this indicates that the kiln has reached the desired temperature range.
- And lastly don’t forget to turn off the kiln and allow it to cool completely before removing the pottery.
If you have an electronic controller you don’t really need to use cones.
How do you clean and finish your pottery after firing?
Here is my process after firing, pottery needs to be cleaned and finished to remove any residue and achieve the desired look and feel.
- Use a soft-bristled brush or cloth to remove any remaining kiln wash or glaze residue from the pottery. Be careful not to scratch or damage the pottery surface.
- Use a fine-grit sandpaper or a polishing stone to smooth any rough spots or edges on the pottery. This will also help to achieve a smooth, polished finish.
- Wash the pottery with warm, soapy water and rinse thoroughly to remove any remaining residue.
- AAdd any final touches, such as decorative elements or handles, to the pottery.
- Some types of pottery may need to be cured after firing to achieve the desired hardness and durability. Follow the manufacturer’s instructions for curing the specific type of pottery being used.
What are some common problems with glazing pottery?
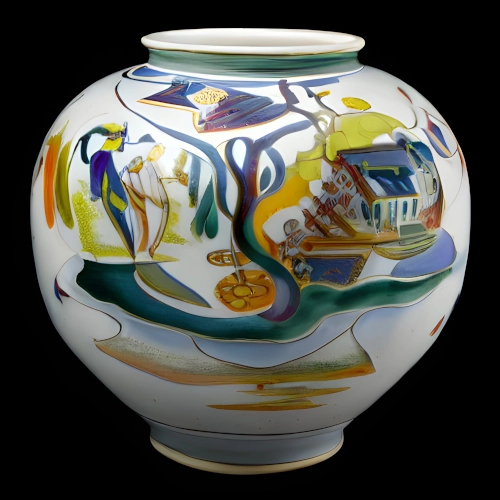
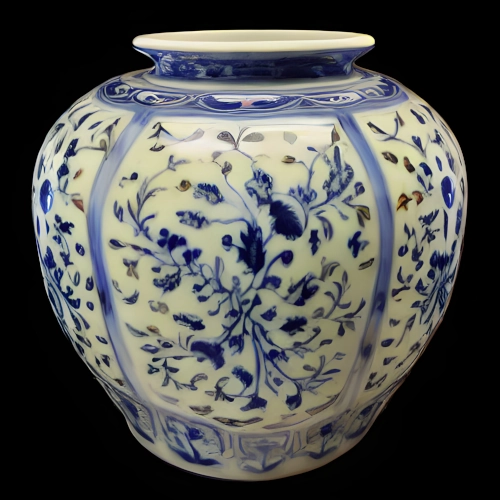
18th century mock up design by Ed
Over the years I have noticed there are several common problems that can arise when glazing pottery.
- Glaze may not be applied evenly, resulting in areas of thick and thin coverage.
- Glaze may drip or run during firing, leaving unsightly marks on the pottery.
- Glaze may crack or peel during firing, often due to the pottery not being completely dry before glazing or due to the glaze not adhering properly to the pottery surface.
- Glaze may develop small pinholes or bubbles during firing, often due to the presence of trapped air or moisture in the clay or glaze.
- Glaze may blister or crawl during firing, often due to the presence of impurities in the glaze or clay.
How do you troubleshoot glaze defects, such as crazing or pinholing?
I have found troubleshooting glaze defects, such as crazing or pinholing, can be challenging, but there are several steps that can be taken to identify and address the problem.
- Carefully examine the glaze surface to identify the specific type of defect, such as crazing or pinholing.
- Evaluate the possible causes of the defect, such as incorrect firing temperature, glaze thickness, or glaze composition.
- Adjust the firing schedule to ensure that the pottery is fired at the correct temperature and for the recommended time, as different types of clay and glaze may require different firing schedules.
- Adjust the glaze thickness to ensure that it is not too thick or too thin, as this can cause problems such as pinholing or crawling.
- Adjust the glaze composition by adding or subtracting certain ingredients, such as frits or opacifiers, to achieve the desired effect.
- Test the glaze on small samples of pottery and adjust as needed until the desired result is achieved.
What safety precautions should you take when glazing pottery?
- Wear a respirator mask or dust mask, safety glasses or goggles, and gloves to protect yourself from dust, glaze particles, and other hazardous materials.
- Make sure your workspace is well-ventilated to reduce the risk of inhaling hazardous fumes or dust. Consider using a ventilation system, such as a downdraft kiln vent or a fume hood, to remove hazardous fumes or dust from the air.
- Handle glazes with care, as some glaze materials may be hazardous or toxic. Follow the manufacturer’s instructions for handling and disposing of glaze materials, and avoid ingesting or inhaling glaze particles.
- Clearly label all glazes and materials, and store them in their original containers to avoid confusion and accidental exposure.
- Clean up your workspace carefully, disposing of hazardous materials and waste in accordance with local regulations. Avoid washing glaze or clay residue down the sink or drain, as this can pollute the water supply.
“Working with glaze materials can be hazardous, so taking safety precautions is essential for the health of the potter and the environment.”
David Jackson
How do you handle and dispose of glaze materials safely?
- Wear protective gear, such as a respirator mask, safety glasses or goggles, and gloves, when handling glaze materials to avoid exposure to hazardous particles.
- Follow the manufacturer’s instructions for handling and disposing of glaze materials, including any safety precautions or recommended protective gear.
- Store glaze materials in their original containers in a cool, dry place away from children and pets.
- Clearly label all glaze materials with their contents and hazard warnings, and keep them in a clearly marked, designated storage area.
- Dispose of glaze materials according to local regulations, which may include hazardous waste disposal or recycling programs. Do not pour glaze materials down the sink or drain, as this can pollute the water supply. Plus it will cause your drain to back up and clog.
Can you glaze pottery without a kiln?
Not really sure why anyone would want to go this route. Glazing pottery without a kiln is possible, but it will not result in a durable, functional piece of pottery. The process of glazing involves firing the pottery at a high temperature to melt the glaze particles and fuse them to the clay body. Without a kiln, the glaze will not melt properly, and the pottery will not be durable or safe for use with food or drink.
However, there are alternative techniques for creating a glazed appearance on pottery without a kiln. One such technique is called “faux-glazing” or “cold glazing,” which involves applying a clear or tinted varnish to the surface of the pottery to create a shiny, glazed appearance. This technique does not involve firing the pottery, and the resulting piece will not be functional or durable.
How do you ensure that your glaze is food-safe?
- I always use food-safe glazes. Use glazes that are labeled as food-safe or non-toxic. These glazes are formulated to be free of harmful substances such as lead, cadmium, and other heavy metals that can leach into food or drink.
- Always check the label of your glazes to ensure that they are formulated for use with food or drink. Some glazes are intended for decorative use only and may not be safe for food or drink.
- Test your glazes on a small area of your pottery before applying them to the entire piece. This will help you identify any potential problems or reactions before using the pottery with food or drink.
- Follow the manufacturer’s instructions for firing your pottery to ensure that the glaze is properly melted and fused to the clay body. Under-firing or over-firing your pottery can affect the safety of the glaze.
- If you are unsure about the safety of your glazes, consult a professional pottery supplier or ceramic engineer who can help you choose and test food-safe glazes.
Conclusion And Summary
Glazing pottery is an important part of the pottery-making process, allowing potters to create beautiful, functional pieces of art. To successfully glaze pottery, potters need to choose the right glaze for their piece, prepare the pottery for glazing, and apply the glaze in a smooth, even coat. After glazing, the pottery needs to be fired in a kiln at the correct temperature to properly fuse the glaze to the clay body. Potters should take safety precautions when working with glazes to avoid exposure to hazardous particles and dispose of glaze materials safely. By following these guidelines, potters can create beautiful, functional pieces of pottery that are safe to use with food or drink.
I have found the art of glazing pottery is a transformative process, a magical journey where a simple clay piece is adorned with a glass-like coating that both protects and beautifies. If you’re new to pottery, you might be wondering, how exactly is this done? Well, you already know because you have read my article up to this point, right? So I’ll quickly recap.
I’ll start with the basics. Glazing pottery involves applying a special mixture of glass-forming ingredients to a fired clay piece, typically bisque ware, or clay that has already undergone an initial firing. This mixture, called a glaze, melts in the kiln to form a hard, glass coating on the surface of the pottery.
Glazing pottery is a multi-step process, starting with ensuring the bisque-fired work is clean and dust-free. Then, you apply the glaze. There are several methods of glazing, each giving different effects. Dip Glazing and Drip glazing are common techniques that involve immersing the pottery into the glaze or pouring the glaze over the pottery. Sponge Glazing, on the other hand, gives a different texture and is exactly what it sounds like, using a sponge to apply the glaze.
Large flat brushes or round-tip brushes can be used to apply the glaze, with the choice of brush impacting the final texture. The first coat of glaze may give a sheen to the piece, but it’s often necessary to apply multiple coats to achieve the desired effect.
One popular type of glaze is Ceramic Slip, a liquid mixture of clay and other soluble materials, which can be used to create intricate patterns on the pottery surface. Another method, Glaze trailing, involves applying glaze in fine lines to create detailed designs.
Remember, the inside surface of your pottery needs glazing too, unless you plan to use it for decorative purposes only. It’s best to glaze the inside first and then proceed to the outside.
Once you’re happy with your glazing, it’s time for the final firing. This is when the real transformation happens, as the glaze melts and forms a hard, shiny surface with a smooth or fine texture. Depending on the glaze used, the piece may emerge from the kiln with vibrant colors and intricate patterns that weren’t visible before firing.
The temperature for this firing depends on the type of clay and glaze used. Earthenware temperatures are typically lower than those for stoneware or porcelain. Glazes also have a melting point, so be sure to check the instructions on the glaze packaging or recipe.
Different types of firing can also affect the final appearance of the glaze. Pit firing, Wood Firing, or using a raku kiln can result in unique effects, particularly with certain types of glazes.
As you already know, (as a ceramic artist) while home ovens typically don’t reach high enough temperatures for firing pottery, kilns can be rented from local ceramics studios, or even bought for home use if you’re serious about your pottery practice.
Finally I always say, don’t be disheartened if your first attempts don’t turn out as expected. Glazing is as much a science as it is an art, requiring practice and experimentation. Consider making test tiles to try out different glazes and firing temperatures. And most importantly, remember to have fun and enjoy the process of transforming your clay piece into a work of art. I hope this helps!
FAQ Section
Q: How do I glaze pottery at home?
A: Glazing pottery at home involves several steps, including selecting the right glaze, applying it to your bisque-fired pottery, and then firing it in a kiln. You’ll need glaze, brushes, and a kiln that can reach the required temperature for the glaze to mature.
Q: Is there a way to glaze pottery without a kiln?
A: While a kiln is the standard method for setting glaze, you can also use alternative techniques like pit firing or using oven-bake clay and glazes. However, these methods may not produce the same durability and finish as a kiln.
Q: What is the process of glazing pottery?
A: The process typically involves these steps:
- Choose the appropriate glaze for your clay body.
- Prepare your bisque-fired pottery by wiping it clean of dust.
- Apply the glaze using brushes, dipping, or pouring methods.
- Allow the glaze to dry.
- Fire the glazed pottery in a kiln to the temperature specified for your glaze.
Q: Can you glaze your own pottery?
A: Yes, you can glaze your own pottery, but it requires specific materials like glazes and a kiln. You’ll also need some knowledge of the types of glazes suitable for your clay and the firing temperatures required.
Q: How many coats of glaze do I need?
A: The number of coats depends on the type of glaze and the effect you’re aiming for. Generally, 2-3 coats are standard for most glazes.
Q: Can you mix different glazes together?
A: Mixing glazes can be done, but it’s important to test the combination first to ensure compatibility and to achieve the desired color and texture.
Q: How long does it take for glaze to dry?
A: The drying time can vary depending on the thickness of the glaze and the humidity of your environment. It can take anywhere from a few hours to overnight.
Q: Do I need to glaze both the inside and outside of my pottery?
A: Whether to glaze the inside, outside, or both largely depends on the intended use of the piece. For functional ware like mugs or bowls, it’s advisable to glaze both the inside and outside.
Q: What safety precautions should I take while glazing?
A: Always work in a well-ventilated area, wear gloves to protect your skin, and use a mask if you’re working with powdered glazes. Make sure to read and follow all safety instructions on your glaze packaging.
Q: Can I re-glaze and re-fire a piece that I’m not happy with?
A: Yes, it’s possible to re-glaze and re-fire pottery, but there are risks like cracking or the glaze not adhering properly. It’s crucial to understand the compatibility between the original and new glazes and to fire at the correct temperature.
References
“Reglazing Pottery: A Comprehensive Guide” by Emily Rogan, Ceramic Arts Network (https://ceramicartsnetwork.org/ceramics-monthly/ceramic-supplies/ceramic-glaze-recipes/reglazing-pottery-a-comprehensive-guide/)
“The Art of Reglazing Pottery” by Linda Bloomfield, The Guardian (https://www.theguardian.com/lifeandstyle/2017/nov/18/the-art-of-reglazing-pottery)
“The Basics of Reglazing Pottery” by The Spruce Crafts (https://www.thesprucecrafts.com/reglazing-pottery-2746269)
“Reglazing Old Pottery” by Mary Ann Lienhart-Cross, Fine Gardening (https://www.finegardening.com/article/reglazing-old-pottery)
“Reglazing Pottery: Is It Worth the Cost?” by The Home Depot (https://www.homedepot.com/c/ab/reglazing-pottery-is-it-worth-the-cost/9ba683603be9fa5395fab90898954f3)
Glazes for the Craft Potter by Harry Fraser (1998)
The Complete Guide to High-Fire Glazes: Glazing & Firing at Cone 10 by John Britt (2004)
Mastering Cone 6 Glazes by John Hesselberth and Ron Roy (2002)
The Potters Dictionary of Materials and Techniques by Frank Hamer (2004)


