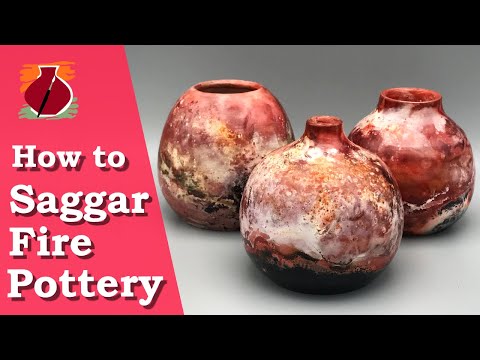
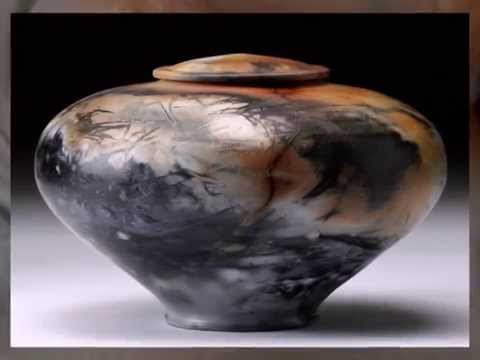
Saggar firing is a ceramic technique where pots are enclosed in a container, or saggar, with combustible materials, creating unique effects and colors during firing. This method protects the pieces from direct flame and ash.
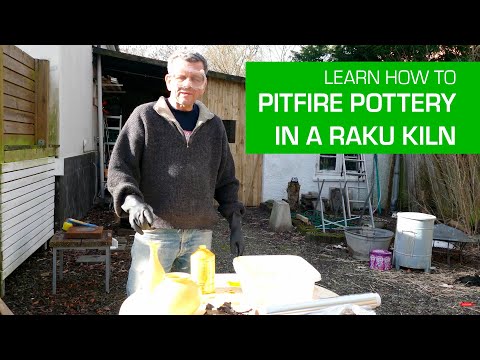
Introduction
This technique has been around for thousands of years. Originally, it was all about making pots using raw materials and burnishing them without glaze. The term ‘saggar’ actually comes from ‘safeguard,’ as it was used to protect pottery from open flame, smoke, gases, and kiln debris during firing. Traditionally, saggars were made from fireclay, and they’ve been used across various cultures, from China to the United Kingdom.

Historical background and evolution
The practice dates back several millennia and has roots in ancient pottery techniques. Originally, the purpose of a saggar was to protect the pottery from the harsh conditions inside the kiln, such as direct flames, ash, and gases. This was crucial especially when glazing techniques were not as advanced or widespread.
Over time, as pottery techniques evolved, so did the use of saggars. In different cultures like in China, Korea, and Japan, saggars were adapted to local ceramic practices. What’s fascinating is how the function of saggars transformed. From being purely protective, they became a tool for artistic expression. By enclosing pots with various combustible materials, potters discovered that they could create unique, unpredictable patterns and colors on the pottery’s surface. This shift reflects a broader trend in ceramics where functionality blends with artistic creativity. The evolution of saggar firing is a testament to the innovative spirit of potters throughout history, constantly experimenting and finding new ways to bring beauty out of the humble clay
Definition and purpose of a saggar in modern ceramics
Fast forward to today, and the role of a saggar has kind of flipped. Now, it’s not just about protection but also about creating unique effects. Modern saggars, often made from materials like aluminum foil, are used to hold a mix of materials close to the pottery’s surface. As these materials burn and smoke during the firing, they leave beautiful, unique marks on the pottery. So, while the saggar’s original purpose was to keep the kiln’s atmosphere clean, it’s now used to create a rich, decorative effect right next to the pot’s surface.1 Pretty cool evolution, right?
Materials and Preparation
Alright, let me talk about the nitty-gritty of materials and preparation for saggar firing.
Types of Clays and Pots Suitable for Saggar Firing:
- The best results in saggar firing are often seen on pots with a smooth, polished surface. Clays low in grog or sand, like cone 5-10 porcelains or white stoneware clays, are ideal.
- The smoother the clay, the more dynamic the surface effects after firing.
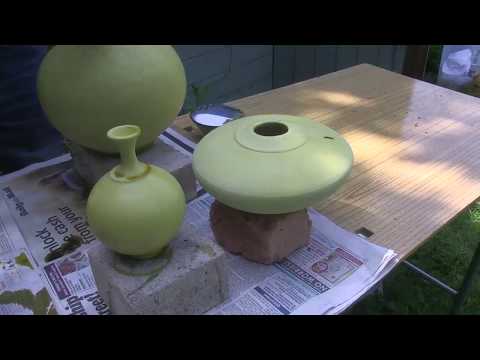
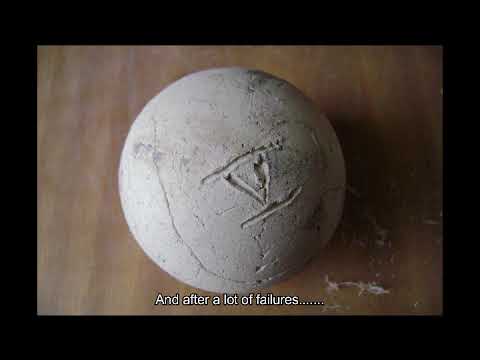
Preparing the Pot:
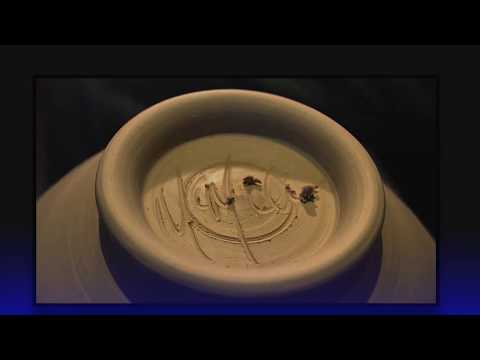
- Burnishing and applying terra sigillata are key. Burnishing compresses the clay surface, making it smooth and ready for the terra sigillata, a fine, slip coating that imparts a soft sheen.
- After applying the terra sigillata, the pot is bisque fired to harden it. This stage is crucial for setting the surface for the saggar firing.
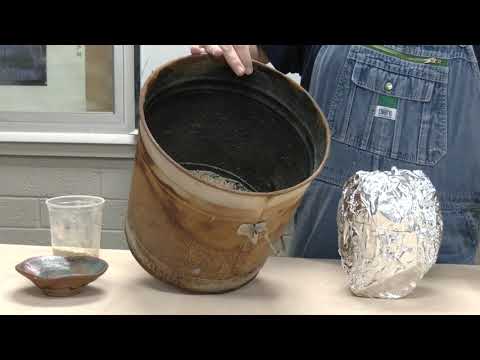
Making the Saggar:
- Traditional saggars are made from fireclay due to its heat resistance. They can be shaped on a wheel or constructed by hand to fit the specific size and shape of the pots.
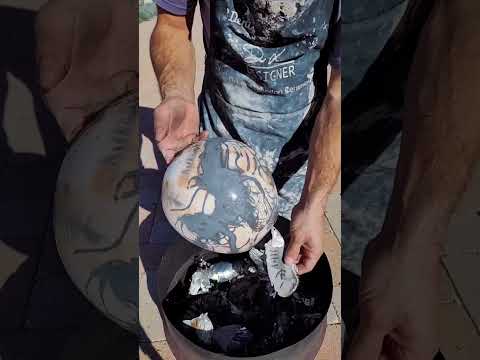
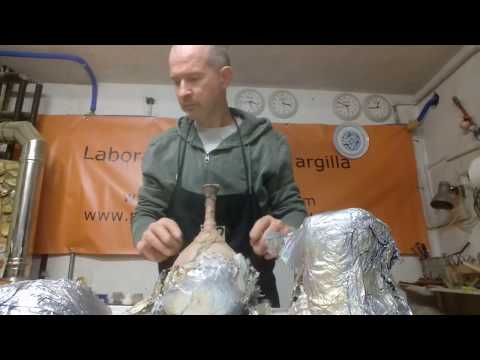
- Alternatively, a simpler and effective method is using aluminum foil, especially for smaller pieces or home studios. The foil encapsulates the pot and the materials, creating a mini-atmosphere for the chemical reactions during firing.
- The construction technique varies depending on the material. For fireclay saggars, consistency in wall thickness is important to avoid cracking.
Types of clays and pots suitable for saggar firing
For saggar firing, the type of clay you choose is crucial because it affects the final appearance and durability of the pot. Here’s a bit more detail:
- Low Grog or Sand Clays: These are preferred because they result in a smoother surface. Porcelain clays, in particular, are ideal because of their fine texture.
- Clay Bodies: You want a clay body that gives a polished surface off the wheel. Cone 5-10 porcelains or white stoneware clays are great choices.
- Surface Consideration: The smoother the clay surface, the more pronounced and dynamic the effects from the saggar firing process will be. This is why preparation, like burnishing, is so important.
So, when choosing your clay for saggar firing, think about how smooth and polished you can get the surface, as this will greatly influence the artistic outcome of the firing process.
Preparing the pot: burnishing, terra sigillata application, and bisque firing
Preparing the pot for firing involves several key steps:
- Burnishing: This is the process of polishing the clay surface while it’s still leather-hard. Using a smooth tool, like a stone or a spoon, you compress and smooth the surface. This makes the pot more receptive to the terra sigillata and creates a nice, smooth finish.
- Applying Terra Sigillata: Terra sigillata is a very fine, liquid clay slip. It’s applied to the burnished surface to give it a soft sheen. The application can be done by brushing, dipping, or spraying. Multiple layers are often used to achieve the desired smoothness and sheen.
- Bisque Firing: After the terra sigillata has dried, the pot is bisque fired. This initial firing hardens the pot and sets the surface for the saggar firing. It’s important not to fire too high at this stage, as it can affect how the pot reacts during the saggar firing process. Typically, a bisque fire to cone 06 is used.
Each of these steps is crucial for ensuring that the pot is ready for the unique environment of saggar firing, where the interplay of the pot’s surface with the materials in the saggar creates distinctive effects.
Making the materials (fireclay, aluminum foil) and techniques for construction
Making a saggar for firing requires selecting appropriate materials and following specific construction techniques:
- Using Fireclay:
- Traditional saggars are crafted from fireclay due to its resistance to high temperatures.
- These are either wheel-thrown or hand-built, often in a bowl shape.
- The key is to maintain consistent thickness in the walls to prevent cracking during firing.
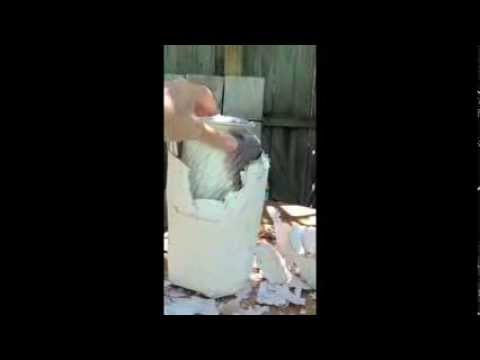
- Using Aluminum Foil:
- A simpler, more accessible option for many potters.
- Large sheets of heavy-duty aluminum foil are used, often crinkled to create texture.
- The foil is wrapped around the pot, sometimes in multiple layers, to create an enclosed space where materials can react with the pot’s surface during firing.
Each method has its advantages: fireclay saggars are durable and traditional, while aluminum foil saggars offer ease and flexibility, especially for smaller or one-off pieces.
The Firing Process
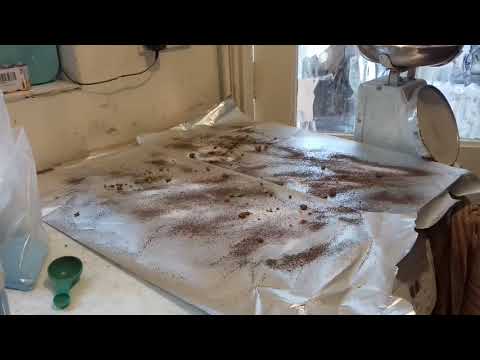
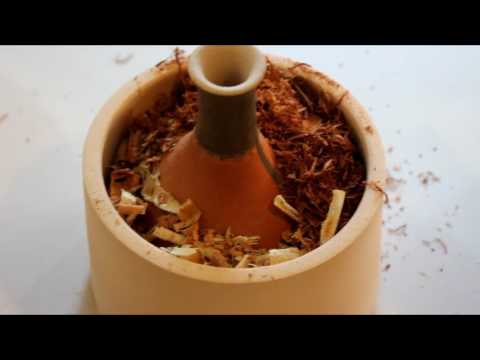
Setting up the saggar with combustible materials and chemical agents for effects (wood shavings, copper carbonate, salt, etc.)
Setting up the saggar involves strategically placing combustible materials and chemical agents around the pot:
- Wood Shavings: These create a reduction atmosphere, leading to unique coloring effects on the pottery. The amount used can influence the final color, with more shavings typically resulting in darker hues.
- Copper Carbonate and Salt: These materials can create vibrant flashes of color and patterns. The salt reacts with the other materials, aiding in the development of textures and colors.
- Other Chemicals: Experimenting with other agents like iron sulfate or copper sulfate can yield varied results.
The arrangement of these materials around the pot within the saggar is crucial, as it directly impacts the smoke, fumes, and flame patterns that are transferred onto the pot’s surface during the firing process.
Stages of heating and temperature control in raku or propane-fired kilns
In saggar firing using raku or propane-fired kilns, temperature control and heating stages are key:
- Initial Heating: The kiln is slowly brought up to a low temperature, often around 500°F (260°C), and held there to ensure even heating and to avoid thermal shock to the pots.
- Ramping Up: The temperature is then gradually increased. In a raku kiln, this might be up to around 1600°F to 1700°F (870°C to 930°C), depending on the desired effects.
- Holding and Cooling: Once the target temperature is reached, it’s maintained for a specific duration, often around 20 minutes, before the kiln is allowed to cool naturally. This slow cooling process is crucial for the development of colors and patterns on the pottery.
Properly managing these stages is essential for achieving the desired outcomes in saggar firing.
The role of ferric chloride and other materials in creating surface effects
Ferric chloride plays a significant role in creating surface effects in saggar firing:
- Chemical Reactions: When applied to the pot, ferric chloride reacts with other materials in the saggar, contributing to a range of colors and patterns on the pot’s surface.
- Application: It can be painted, sprayed, or poured on the pot, often in combination with other materials like copper sulfate or salt.
- Variety of Effects: Depending on its concentration and the other materials used, ferric chloride can produce a spectrum of hues and textures, making it a popular choice for potters seeking unique finishes.
Post-Firing Treatments and Finishing Touches
When I remove and handle the fired pots
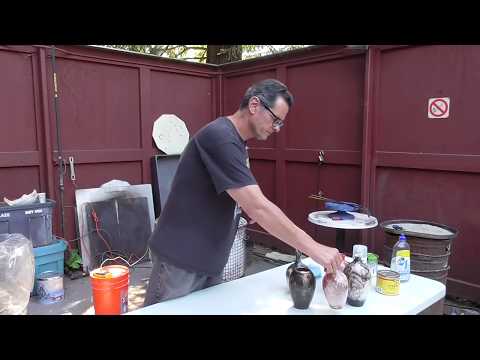
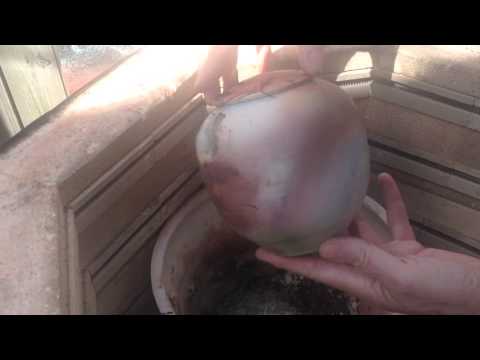
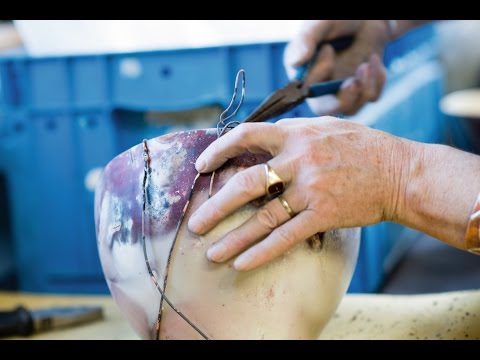
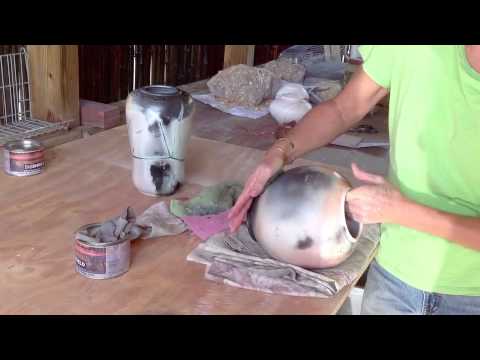
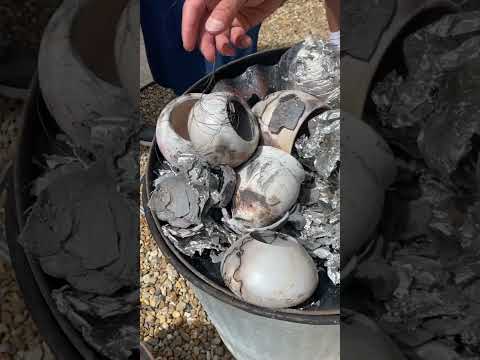
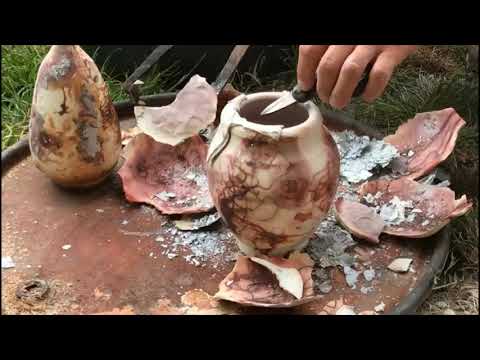
Removing the saggar and handling the fired pots involves care and precision:
- Cooling: After firing, the kiln is allowed to cool down to a safe temperature before handling the pots.
- Unwrapping: The saggar, especially if it’s aluminum foil, is carefully removed. The foil may be fragile and crumble easily.
- Cleaning: The pots are then cleaned to remove ash and debris. This might involve gentle brushing, rinsing, or wiping.
- Final Touches: After cleaning, additional finishing like waxing or sealing may be applied to enhance the pot’s appearance.
Here are some techniques I know about for cleaning and enhancing the pot’s surface (waxing, polishing, using acrylic sealer)
Cleaning and enhancing the pot’s surface after saggar firing involves a few key techniques:
- Dusting and Rinsing: Initially, pots are dusted off to remove loose debris. If needed, they can be gently rinsed under warm water.
- Waxing: Applying wax, like Briwax or beeswax, gives the pot a rich, glossy finish. It’s applied after the pot is completely dry and then buffed to a shine.
- Polishing: Using soft cloths or brushes, the surface can be polished to enhance its smoothness and sheen.
- Acrylic Sealer: For a more durable finish, a non-yellowing acrylic gloss sealer can be sprayed on the pot, providing a protective layer and enhancing the colors and patterns.
Creative Variations and Experimental Approaches
Exploring different materials for unique effects (seaweed, cat food, crushed vitamins)
Exploring different materials in saggar firing can yield fascinating effects. Here’s a table highlighting some unique materials and their associated effects:
| Material | Associated Effects |
|---|---|
| Seaweed | Can create greenish hues and organic, watercolor-like patterns. |
| Cat Food | May leave brownish spots and unexpected textures. |
| Crushed Vitamins | Could result in speckled patterns and bursts of color. |
| Horsehair | Known to create thin, delicate lines with a smoky appearance. |
| Pine Needles | Often produce starburst patterns and earthy tones. |
| Copper Wire | Can create reddish marks and striking linear effects. |
Among these, seaweed is particularly interesting for its ability to impart natural, fluid patterns, making each piece distinctly organic in appearance.
Adapting the process for different firing methods and kiln types
Adapting saggar firing to different kiln types and firing methods is part of the fun and challenge. For instance, in a propane-fired raku kiln, I control the temperature and atmosphere more precisely. But in a pit fire or a barrel kiln, the results are more unpredictable, which can be exciting. Each kiln type influences how the materials interact and the effects they create on the pottery. It’s all about experimentation and seeing how different environments change the outcome. It keeps the process fresh and interesting every time.2
A word about pit firing
Determining the exact ratio of successful to damaged pots in pit firing is challenging as it can vary greatly depending on numerous factors such as the skill of the potter, the quality of the materials used, and the specific conditions of each firing. Pit firing is known for its unpredictability, which is part of its charm. However, this also means that there’s a higher risk of pots cracking or being damaged compared to more controlled kiln environments. Generally, potters should expect some level of trial and error, with the likelihood of some pots not surviving the process. The key is to learn from each firing, adjusting techniques and materials to improve success rates over time. Just prepare yourself for some broken pots!
What I have learned about troubleshooting common issues and tips for successful outcomes
In saggar firing, common issues include cracking, uneven coloring, and lack of desired effects. To troubleshoot:
- Cracking: Ensure even thickness in your saggar and pot, and avoid rapid temperature changes.
- Uneven Coloring: Experiment with the placement and amount of combustibles and chemicals.
- Lack of Effects: Adjust firing temperatures and durations, and experiment with different materials.
The key to success is patience and willingness to experiment. Each firing can be a learning experience, guiding you to refine your process for better results.
Tutorials


Conclusion
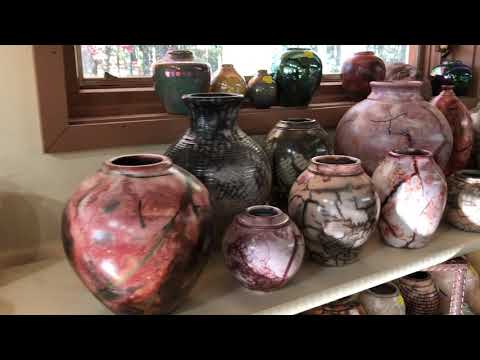
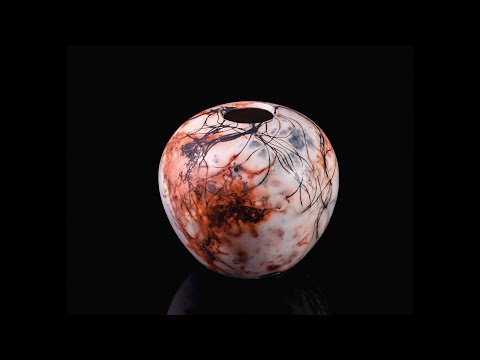
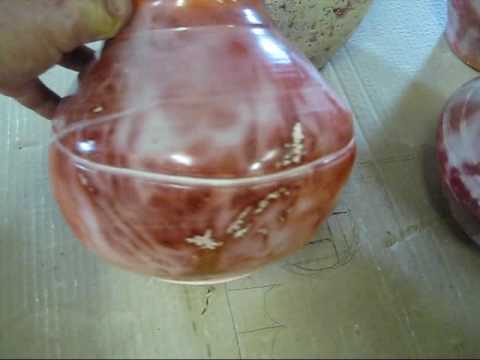
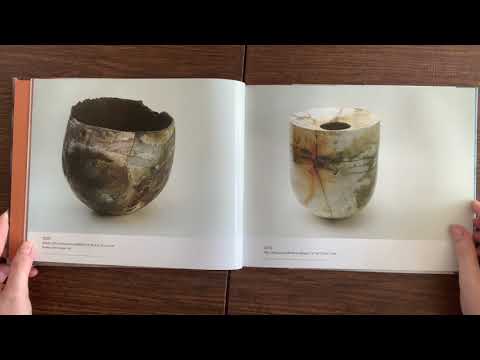
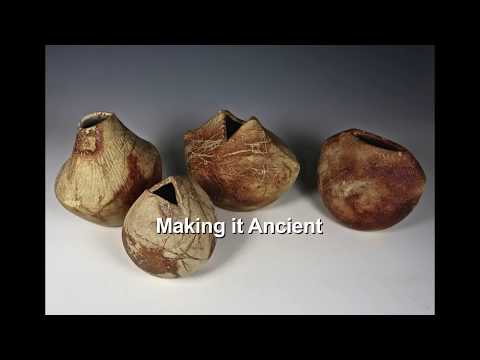
The uniqueness and unpredictability of saggar firing results
I believe Saggar firing’s beauty lies in its unpredictability and uniqueness. Each piece emerges with its own distinct patterns and colors, influenced by the combination of materials used and the firing environment. This lack of control is exciting; it transforms each firing into a surprise reveal. The process is a dance between the potter’s intentions and the kiln’s whims, creating one-of-a-kind ceramic art every time.
My advise for continued experimentation and exploration
In the world of ceramic art, experimentation and exploration are key. Each saggar firing is an opportunity to try new materials, techniques, and combinations. Embrace the unexpected outcomes as part of the creative journey. Keep experimenting, and remember, each piece tells its own story. Your next masterpiece could be just one firing away. Keep exploring, learning, and most importantly, enjoying the artistic process!
FAQ
Q: How does saggar firing work?
A: Saggar firing involves enclosing a pot in a container (saggar) with combustible materials like wood shavings and chemicals. During firing, these materials create unique effects on the pot’s surface through smoke and fumes.
Q: Is saggar firing food safe?
A: Generally, saggar-fired ware is not considered food safe due to the unpredictability of surface treatments and the use of non-food-safe materials during the firing process.
Q: What is reduction firing in saggar?
A: Reduction firing in saggar refers to creating a reduced oxygen environment within the saggar, leading to unique glaze effects and colors on the pottery, often richer and more varied than in an oxidation atmosphere.
Q: Can you do a saggar firing in an electric kiln?3
A: Yes, saggar firing can be done in an electric kiln, though the effects may differ from those in a raku or gas kiln due to the different firing atmospheres.
Additional Questions:
Q: How long does a saggar firing typically take?
A: The duration varies but typically ranges from a few hours to a full day, depending on the kiln type and desired effects.
Q: Can any clay be used for saggar firing?
A: While many clays can be used, smoother clays like porcelain or smooth stoneware are preferred for their polished surfaces, which better capture the effects of the saggar firing process.
Interactive Saggar Firing Quiz
Question 1: What does ‘saggar’ stand for in saggar firing?
Question 2: Can saggar firing be performed in an electric kiln?
Question 3: Is pottery created through saggar firing generally considered food safe?
Footnotes
- von Dassow, Sumi. Low-firing and Burnishing. United Kingdom: A&C Black, 2009. ↩︎
- Watkins, James C.., Wandless, Paul Andrew. Alternative Kilns & Firing Techniques: Raku, Saggar, Pit, Barrel. United States: Lark Books, 2004. ↩︎
- van de Grint, Jolanda. Saggar Firing in an Electric Kiln: A Practical Handbook. United States: Schiffer Publishing, Limited, 2021. ↩︎


