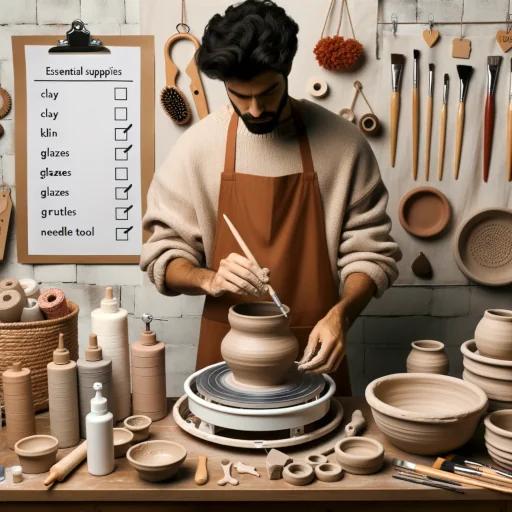
First and foremost, you’ll need clay, the raw material for your creations. A pottery wheel is essential for throwing, while hand-building techniques require simple tools like a needle tool and a rib. A kiln is crucial for firing your pieces, transforming them from soft clay to hardened ceramics. Glazes and underglazes add color and finish, making your work truly unique. Don’t forget a sturdy worktable and a plaster bat for a clean, flat surface. Additional items like sponges, wire cutters, and brushes round out the basic supplies you’ll need.1
Must-Have Supplies
Clay
- Earthenware: Good for beginners but needs to be glazed.
- Stoneware: Versatile and doesn’t require glazing.
- Porcelain: Difficult to work with, best for experienced potters.
Tools for Shaping and Carving
- Needles: For measuring thickness and carving.
- Cutter Wire: To divide large blocks of clay.
- Ribbon Tools: For trimming and carving.
- Scrappers: For final smoothing of pieces.
- Fettling Knives: Versatile for various tasks.
Pottery Wheel
- Budget Models: Like the Speedball Artista Pottery Wheel, cost around $500.
- Professional Models: More expensive but offer better performance.
Kiln
- Electric Kiln: Adjustable temperature settings.
- Manual Kiln: Requires monitoring but is usually cheaper.
Basic Decorating Materials
- Glaze: For waterproofing and decoration.
- Acrylic Paints: For additional decoration.
Nice-to-Have Supplies
Additional Tools
- Chamois Cloth: For creating smooth surfaces.
- Calipers: For precise measurements.
- Brushes: Especially for glazing or applying slip.
- Sponges: For shaping and cleaning surfaces.
Extra Decorating Materials
- Liquid Latex: For more intricate designs.
- Transfer Printing Tools: For advanced decoration techniques.
Convenience Items
- Towels and Aprons: To keep yourself and your workspace clean.
Advanced Kilns
- Dual Medium Kilns: Capable of firing both clay and glass.
What is the Lowest Firing Clay That Beginner Potters Should Use?
When it comes to selecting clay for beginner potters, the lowest firing clay that is often recommended is earthenware. Earthenware is a popular choice for several reasons:
Firing Temperature
Earthenware fires at a lower temperature range, usually between 1745°F (952°C) and 2109°F (1154°C). This makes it more forgiving and easier to manage for those who are new to pottery.
Cost-Effectiveness
Earthenware is generally less expensive than other types of clay, such as stoneware or porcelain. This makes it a cost-effective option for beginners who are still experimenting and learning the craft.
Ease of Use
Earthenware is softer and more pliable than other types of clay, making it easier to mold and shape. This is particularly beneficial for beginners who may not yet have developed the skills for working with less forgiving materials.
Quick Drying
Due to its porous nature, earthenware dries more quickly than other types of clay. This can be advantageous for beginners eager to move on to the next steps of the pottery-making process.
Glazing Options
Earthenware is often bisque fired and then glazed to make it waterproof. The lower firing temperature allows for a wider range of glazing options, which can be particularly fun for beginners looking to experiment with colors and designs.
How to Select Appropriate Pottery Glazes for a Unique Look and Feel
Choosing the right glaze for your pottery can significantly impact its final appearance and functionality. Here’s how you can select appropriate pottery glazes to give your work a unique look and feel:
Understand Your Clay Body
Before selecting a glaze, it’s crucial to understand the type of clay you’re using. Different clays have varying firing temperatures and may react differently to specific glazes.
Know Your Firing Temperature
Glazes are designed to mature at specific temperatures. Make sure the glaze you choose is compatible with your clay and your kiln’s firing range.
Experiment with Colors and Textures
Glazes come in a variety of colors, textures, and finishes. Experimenting with different combinations can help you achieve a unique look. You can even layer different glazes to create more complex effects.
Matte vs. Glossy
Decide whether you want a matte or glossy finish. Matte glazes offer a soft, muted look, while glossy glazes provide a shiny, reflective surface.
Test, Test, Test
Always test your chosen glaze on a sample piece before applying it to your final work. This will give you an idea of how the glaze will look after firing.
Consider the Function
If your pottery will be used for food or drink, make sure to select a food-safe glaze. Some glazes contain materials that are not safe for food contact.
Check for Compatibility
Some glazes react with each other or with certain types of clay, causing unexpected results like crawling or crazing. Always check for compatibility before layering different glazes.
Seek Inspiration
Look at other artists’ work, attend pottery shows, or browse online galleries for inspiration. This can give you new ideas for glaze combinations and techniques to try.
Benefits of Using Electric Kilns Compared to Gas-Fired Kilns in Pottery
Ease of Use
Electric Kilns:
Electric kilns are generally easier to operate, especially for beginners. They often come with digital controllers that allow for precise temperature control.
Gas Kilns:
Gas kilns require a more hands-on approach and a deeper understanding of the firing process, making them less suitable for beginners.
Consistency
Electric Kilns:
Electric kilns offer more consistent heat distribution, which is crucial for even firing and fewer defects in the pottery.
Gas Kilns:
Gas kilns can have hot and cold spots, requiring careful placement of pottery and more frequent monitoring.
Installation and Space
Electric Kilns:
Electric kilns are usually smaller and easier to install, requiring only an electrical outlet. They are ideal for home studios or small spaces.
Gas Kilns:
Gas kilns are generally larger and require a more complicated installation process, including gas lines and often a chimney.
Atmosphere Control
Electric Kilns:
Electric kilns provide an oxidation atmosphere, which is good for bright, vibrant glaze colors.
Gas Kilns:
Gas kilns allow for both oxidation and reduction atmospheres, offering more versatility in glaze results but requiring more skill to manage.
Safety
Electric Kilns:
Electric kilns are generally considered safer as they don’t produce open flames or require gas lines.
Gas Kilns:
Gas kilns involve the use of flammable gas and open flames, requiring more stringent safety measures.
Cost
Electric Kilns:
Electric kilns are usually less expensive upfront but can be costly in terms of electricity usage.
Gas Kilns:
Gas kilns have a higher initial cost but can be more cost-effective in the long run depending on local gas prices.
Environmental Impact
Electric Kilns:
If powered by renewable energy, electric kilns can be a more eco-friendly option.
Gas Kilns:
Gas kilns usually rely on fossil fuels, which have a higher carbon footprint.
Balancing Tradition and Modernity in Pottery Making
By blending the old with the new, you can keep the ancient craft of pottery alive while adding your own modern twist. This balance can make your work both deeply rooted and innovatively fresh.
Embracing Traditional Techniques
Why It’s Important:
Understanding the roots of pottery and the techniques that have been passed down through generations can give your work depth and authenticity.
How to Do It:
- Study ancient pottery forms and styles.
- Learn traditional techniques like coiling, pinching, and slab building.
Incorporating Modern Tools and Technology
Why It’s Important:
Modern tools can make the pottery process more efficient and open up new possibilities for design and form.
How to Do It:
- Use electric pottery wheels for more consistent shapes.
- Experiment with 3D printing for complex forms.
- Utilize digital kilns for precise temperature control.
Experimenting with Materials
Why It’s Important:
New materials can offer different textures, colors, and structural possibilities.
How to Do It:
- Try using porcelain or stoneware clays for different effects.
- Experiment with modern glazes and underglazes.
Staying Updated and Inspired
Why It’s Important:
The world of pottery is always evolving, and staying updated can provide fresh inspiration.
How to Do It:
- Follow contemporary potters on social media.
- Attend pottery exhibitions and workshops.
- Read pottery journals and blogs.
Sustainability
Why It’s Important:
Modern pottery can also be sustainable, aligning with current environmental concerns.
How to Do It:
- Use eco-friendly materials and glazes.
- Recycle clay and minimize waste.
Personal Expression
Why It’s Important:
While it’s good to respect tradition, your unique voice is what will make your work stand out.
How to Do It:
- Don’t be afraid to break the rules once you’ve learned them.
- Experiment with form, color, and texture to find your unique style.
To Wheel or Not to Wheel: A Beginner’s Dilemma
Starting Without a Potter’s Wheel
Why It’s a Good Idea:
- Cost-Effective: Pottery wheels can be expensive. Starting without one allows you to explore the craft without a big financial commitment.
- Skill Building: Techniques like pinching, coiling, and slab building don’t require a wheel and are excellent for building foundational skills.
- Space: Wheels take up space. If you’re unsure about your long-term commitment to pottery, it might be wise to start small.
How to Do It:
- Handbuilding Techniques: Master the basics of coiling, pinching, and slab building.
- Community Studios: Use community studio spaces that offer access to wheels, so you can try before you buy.
Investing in a Potter’s Wheel
Why It’s a Good Idea:
- Skill Advancement: If you’re serious about mastering pottery, a wheel is almost a must for advancing your skills.
- Efficiency: Wheels make the process faster and can produce more uniform pieces.
- Long-Term Savings: If pottery becomes a long-term hobby or career, owning a wheel can be more cost-effective over time.
How to Do It:
- Budget: Determine what you can afford. There are various types of wheels, from manual to electric, with varying price points.
- Space: Make sure you have a dedicated space for the wheel.
- Research: Read reviews, ask for recommendations, and if possible, test out different models.
The Middle Ground
- Classes and Workshops: Many places offer classes that include the use of a wheel. This can be a good introduction before making a purchase.
- Renting: Some studios rent out wheels by the hour or offer memberships that include wheel time.
Final Thoughts
If you’re just dipping your toes into the world of pottery, it’s perfectly fine to start without a wheel. As you grow more passionate and skilled, investing in a potter’s wheel can take your craft to the next level. The key is to assess your commitment, budget, and space before making a decision.
Tips for Beginner Potters: Your Journey to Clay Mastery
Start Simple
Choose the Right Clay
- Earthenware: It’s forgiving and great for beginners.
- Stoneware: Once you’re comfortable, this offers more durability.
Basic Tools
- Needle Tool, Rib, and Sponge: These are your bread and butter.
Learn the Techniques
Handbuilding First
- Pinching, Coiling, Slab Building: Master these before moving to the wheel.
Wheel Throwing
- Centering is Key: Take your time to learn this crucial step.
Practice, Practice, Practice
Consistency
- Daily Practice: The more you practice, the better you’ll get.
Experiment
- Try Different Styles: Don’t be afraid to step out of your comfort zone.
Understand the Firing Process
Bisque Firing
- Bone Dry: Make sure your piece is completely dry to avoid cracks.
Glaze Firing
- Test First: Always test your glazes on a small piece first.
Join a Community
Take Classes
- Structured Learning: Great for mastering the basics quickly.
Online Forums and Social Media
- Peer Support: It’s motivating and you can learn from others’ experiences.
Safety First
Proper Ventilation
- Avoid Fumes: Make sure your workspace is well-ventilated.
Protective Gear
- Gloves and Masks: Especially important when dealing with glazes and chemicals.
Enjoy the Process
- Be Patient: Mistakes are part of the learning curve.
- Have Fun: After all, it’s a form of expression and should bring you joy.
Embarking on your pottery journey is exciting but can be daunting. Remember, every master was once a beginner. So, arm yourself with the right tools, a curious mind, and a lot of enthusiasm. Happy potting and bookmark us!
Footnotes
- Pottery Book for Beginners: An Instruction Guide for Potters to Sculpt Wheel Thrown and Handbuilding Ceramic Projects With Tips, Techniques and Pottery Tools Included. N.p.: Wade Marsh, (n.d.). ↩︎


