Start with the right type of clay. The next crucial step is learning to knead the clay to remove air bubbles, followed by shaping it using techniques like coiling, pinching, or using a potter’s wheel. Glazing comes next, where you choose the right type of glaze to give your pottery color and finish. The final step is firing your piece in a kiln to harden it and set the glaze. Throughout this process, it’s essential to be patient and willing to practice, as mastery comes with time and experience.1
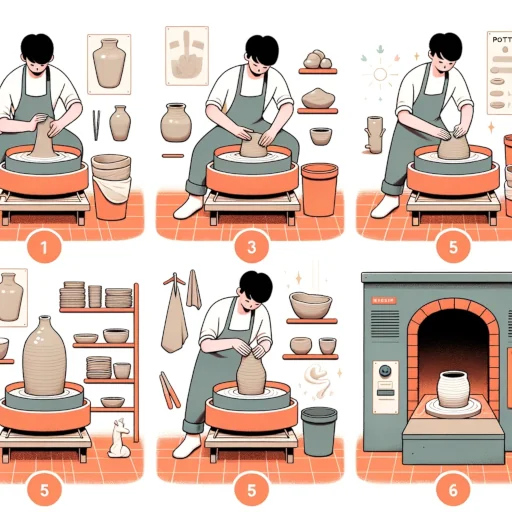
Steps
Step 1: Choose Your Clay
- Earthenware: Lower-firing, more porous, easier to mold.
- Stoneware: High heat tolerance, dense, durable, good for beginners.
- Porcelain: High heat tolerance, smooth, less malleable.
Step 2: Wedging the Clay
- Eliminate air bubbles.
- Achieve uniform consistency and moisture level.
Step 3: Choose a Pottery Making Technique
- Throwing: Done on a pottery wheel, requires skill in centering clay.
- Coiling: Forming coils and stacking them to make a pot.
- Pinch Pot: Simplest form, pinching clay into shape.
Step 4: Crafting the Pot
- Use the chosen technique to shape your pot.
- Ensure the clay pot has a uniform thickness of about a quarter of an inch.
Step 5: Trimming and Decorating
- Done when the clay is in the leather-hard stage.
- Can use underglazes, slips, and sculpting tools.
Step 6: Bisque Firing
- Ensure the clay is bone dry.
- Use a kiln for bisque firing, usually at temperatures ranging from Cone 06 to 04.
Step 7: Glazing
- Apply glaze or underglaze after bisque firing.
- Methods include dipping, spraying, brushing, and pouring.
Step 8: Glaze Firing
- Load the glazed pottery into the kiln for the final firing.
- Temperatures range from 1828°F to 2345°F depending on the type of clay and glaze used.
Additional Tips
- Recycle your clay if you make a mistake.
- Ensure the clay is bone dry before firing to prevent cracking.

Step 1: Choose Your Clay
Choosing the right type of clay is the foundation of your pottery-making journey. The type of clay you select will determine not only the texture and durability of your finished piece but also the techniques you’ll use to shape and fire it. Here’s a detailed look at the three main types of clay:
Earthenware
Properties
- Lower-firing: Earthenware fires at a lower temperature range, usually between 1745°F to 2012°F (Cone 06 to 04).
- More Porous: This type of clay is more porous, meaning it absorbs water easily.
- Easier to Mold: Earthenware is generally softer and easier to shape, making it ideal for beginners.
Uses
- Perfect for decorative pieces like planters and vases.
- Commonly used for tiles and dishware.
Considerations
- Because it’s porous, it’s not ideal for storing liquids unless glazed properly.
- More prone to chipping and cracking compared to other types.
Stoneware
Properties
- High Heat Tolerance: Stoneware can be fired at high temperatures, ranging from 2150°F to 2336°F (Cone 5 to 8).
- Dense and Durable: It is less porous and more durable, making it ideal for functional pieces.
- Good for Beginners: Stoneware is forgiving and versatile, making it a good choice for those new to pottery.
Uses
- Ideal for dinnerware, mugs, and serving dishes.
- Used for outdoor pottery like garden pots.
Considerations
- Requires higher firing temperatures, which may not be achievable in all kilns.
- Generally more expensive than earthenware.
Porcelain
Properties
- High Heat Tolerance: Like stoneware, porcelain also requires high firing temperatures, usually above 2300°F (Cone 9 and above).
- Smooth Texture: Porcelain has a smooth, almost glass-like texture when fired.
- Less Malleable: It is less forgiving and harder to work with compared to other clays.
Uses
- Often used for fine art pieces and high-end tableware.
- Suitable for intricate and detailed work.
Considerations
- Requires a skilled hand and is not recommended for beginners.
- Because of its high firing temperature, it can be expensive to produce.
Deeper Dive: Thought-provoking question – How does the choice of clay serve as both a technical constraint and an artistic opportunity, shaping the limitations and possibilities of what you can create?
My question invites you to explore deeper into how the type of clay influences not just the physical characteristics of the finished piece, but also the creative and artistic decisions you make throughout the pottery-making process.
My advise is: The choice of clay in pottery is a pivotal decision that functions as both a technical constraint and an artistic opportunity. And here’s how:
As a Technical Constraint
- Firing Temperature: Different clays require different firing temperatures. Earthenware, for example, is fired at lower temperatures than stoneware or porcelain. This limits the types of glazes that can be used and affects the final strength and durability of the piece.
- Workability: Some clays are more plastic and easier to work with on the wheel, while others are better suited for hand-building techniques. This can restrict the kinds of forms you can efficiently create.
- Shrinkage and Warping: Clays have different rates of shrinkage and susceptibility to warping, affecting the complexity and size of the pieces you can make.
- Color: The natural color of the clay body, influenced by its mineral content, will affect the final appearance of the piece, particularly if you are using transparent or translucent glazes.
As an Artistic Opportunity
- Texture and Finish: Different clays offer different textures and finishes. For example, grogged clay provides a rough texture that might be desirable for certain artistic effects.
- Complexity: High-fire clays like porcelain allow for more intricate and delicate forms, offering a different range of artistic possibilities compared to more robust but less delicate clays like earthenware.
- Glaze Interaction: The choice of clay can dramatically affect how glazes react, providing opportunities for unique aesthetic outcomes.
- Expressive Range: Each type of clay has its own “personality,” and getting to know these can expand your expressive range as an artist. Some clays are well-suited for bold, rustic forms, while others are better for fine, detailed work.
Intersection of Constraint and Opportunity
- Innovation within Limitation: The constraints imposed by a specific type of clay can encourage innovative problem-solving and lead to unexpected and original artistic solutions.
- Material as Muse: The specific properties of a clay can inspire new directions in your work, serving as a co-creator in your artistic journey.
- Skill and Adaptability: Working with different types of clay can enhance your skill set and make you a more versatile artist, capable of realizing a broader range of artistic visions.
In summary, I have found the choice of clay is a foundational decision that affects every stage of the pottery-making process, from initial concept to final firing. It sets both the boundaries and the possibilities of your artistic expression, making it a critical element in the craft of pottery.
Step 2: Wedging the Clay
Wedging is a critical preparatory step in the pottery-making process. It’s akin to kneading dough in baking; it prepares the clay for shaping and ensures that it behaves consistently during the forming and firing stages. Here’s a detailed look at the key objectives of wedging:
Eliminate Air Bubbles
Importance
- Air Bubbles Cause Cracks: Trapped air bubbles can expand during firing, leading to cracks or weak spots in the finished piece.
- Uniform Density: Removing air bubbles ensures that the clay has a uniform density, which is crucial for both shaping and firing.
Techniques
- Spiral Wedging: This involves cutting the clay into pieces and then pushing and turning it in a spiral motion.
- Rams Head Wedging: Also known as “bull-nose” or “ox-head” wedging, this technique involves folding and pressing the clay repeatedly.
Achieve Uniform Consistency and Moisture Level
Importance
- Consistency Affects Shaping: Uneven moisture levels can make the clay difficult to shape uniformly.
- Firing Issues: Inconsistent moisture can lead to uneven drying and firing, causing cracks or warping.
Techniques
- Cut and Slam Method: This involves cutting the clay into pieces and slamming them together to mix thoroughly.
- Cone Wedging: This technique involves forming the clay into a cone shape, then pressing it down and reforming the cone, repeating the process several times.
Tools
- Wedging Board: A plaster or wooden surface can be used for wedging.
- Wire Cutter: Useful for cutting the clay into manageable pieces for wedging.
Step 3: Choose a Pottery Making Technique
Once you’ve prepared your clay, the next step is to decide on the pottery-making technique you’ll use to shape it. The technique you choose will depend on your skill level, the tools you have available, and the type of piece you want to create. Here are the details on three popular techniques:
Throwing
What It Is
- Pottery Wheel Required: Throwing is done on a pottery wheel and is one of the most common methods for creating symmetrical, round pieces.
Skill Requirements
- Centering Clay: One of the most crucial skills in throwing is centering the clay on the wheel, which sets the stage for the entire shaping process.
Steps
- Center the Clay: Place the clay on the wheel and use your hands to center it while the wheel spins.
- Open the Clay: Create a hole in the center and widen it to form the base.
- Raise the Walls: Use your fingers to pull the clay upwards, forming the walls of the pot.
Considerations
- Requires a pottery wheel, which can be expensive.
- Takes time to master the skill of centering and shaping.
Coiling
What It Is
- Hand-Building Technique: Coiling involves rolling out long ropes of clay and stacking them to build the walls of a pot.
Steps
- Roll Coils: Roll out long, even coils of clay.
- Stack Coils: Begin stacking the coils on top of each other, blending them together as you go.
- Smooth Surface: Use a rib tool or your fingers to smooth the surface and blend the coils.
Considerations
- Great for creating organic, asymmetrical shapes.
- Easier to master than throwing but can be time-consuming.
Pinch Pot
What It Is
- Simplest Form: The pinch pot technique is the most basic form of pottery making and is often taught to beginners.
Steps
- Form a Ball: Start with a ball of clay.
- Create a Hole: Press your thumb into the center of the ball to create a hole.
- Pinch the Walls: Use your fingers to pinch and shape the walls of the pot.
Considerations
- Ideal for small, simple projects like bowls or cups.
- Excellent for children or those new to pottery as it requires minimal tools and skills.
Step 4: Crafting the Pot
After selecting your pottery-making technique, the next step is to actually craft your pot. This is where your creativity and skills come into play. Here’s what you need to know:
Using the Chosen Technique to Shape Your Pot
Importance
- Technique-Specific Skills: Each technique—whether it’s throwing, coiling, or pinch pot—requires a unique set of skills. Mastering these will help you shape your pot effectively.
Steps
- Initial Shaping: Use your chosen technique to give your clay an initial shape. This could be a simple bowl form for pinch pots, a cylinder for throwing, or a base coil for coiling.
- Refinement: Once the initial shape is achieved, refine it further to match your vision. This could involve trimming excess clay, adding handles, or carving designs.
Ensuring Uniform Thickness
Importance
- Structural Integrity: A uniform thickness ensures that your pot will dry and fire evenly, reducing the risk of cracks or breaks.
- Aesthetic Consistency: Uniform thickness also contributes to a more polished, professional look.
How to Achieve It
- Calipers: Use calipers to measure the thickness of the walls and base of your pot. Adjust as necessary.
- Visual and Tactile Checks: Use your eyes and fingers to feel for inconsistencies in thickness. Smooth out or add clay as needed.
Guidelines
- Quarter-Inch Rule: A good rule of thumb is to aim for a uniform thickness of about a quarter of an inch. This provides a good balance between durability and aesthetics.
Tools
- Ribs: These are flat pieces of wood, metal, or plastic used to smooth and compress the clay.
- Loop Tools: These are used for trimming and refining the shape of your pot.
Step 5: Trimming and Decorating
Once your pot has been shaped and has reached the leather-hard stage, it’s time to trim and decorate. This stage is crucial for adding the final touches that make your piece unique. Here’s what you need to know:
Leather-Hard Stage
Importance
- Workability: The leather-hard stage is when the clay is firm but still damp enough to be worked on. It’s the ideal time for trimming and decorating.
Identifying the Stage
- Touch Test: The clay should feel cool to the touch but not wet. It should hold its shape but still allow for carving and additions.
Trimming
What It Is
- Refining the Shape: Trimming involves removing excess clay to refine the shape of your pot. This is especially important for thrown pieces.
Tools
- Trimming Tools: These are specially designed tools with sharp edges for cutting away excess clay.
Steps
- Secure the Pot: Place your pot upside down on the wheel or a turntable.
- Trim Excess: Use trimming tools to remove excess clay from the base and walls.
- Smooth Edges: Use a rib or sponge to smooth any rough edges.
Decorating
What It Is
- Adding Aesthetic Elements: Decorating is the process of adding colors, patterns, and textures to your pot.
Tools and Materials
- Underglazes: These are colored materials applied to the surface for decoration.
- Slips: These are liquid clay mixtures used for both color and texture.
- Sculpting Tools: These can be used to carve designs into the surface.
Steps
- Apply Underglaze: Use brushes to apply underglaze in your desired pattern.
- Add Slip: Use various tools to apply slip for texture or color.
- Carve Designs: Use sculpting tools to carve intricate designs into the clay surface.
Considerations
- Test First: Always test your decorating materials on a small piece of clay first to see how they will look after firing.
Step 6: Bisque Firing
The bisque firing is a critical step in the pottery-making process, serving as the first high-temperature firing to harden the clay and prepare it for glazing. Here’s a detailed look at this stage:
Ensuring the Clay is Bone Dry
Importance
- Preventing Cracks: Firing clay that is not completely dry can lead to cracks or even explosions in the kiln due to trapped moisture.
How to Ensure Dryness
- Visual Inspection: The clay should appear lighter in color when it’s dry.
- Touch Test: The clay should feel room temperature to the touch, not cool.
- Time: Depending on the thickness and size of your piece, drying can take anywhere from a few days to a couple of weeks.
Using a Kiln for Bisque Firing
What It Is
- Initial Firing: Bisque firing is the first firing and is done to transform the clay into a porous state for glazing.
Temperature Range
- Cone 06 to 04: The typical temperature range for bisque firing is from Cone 06 (around 1828°F or 1000°C) to Cone 04 (around 1945°F or 1063°C).
Steps
- Load the Kiln: Place your bone-dry pieces in the kiln, ensuring they do not touch each other.
- Set the Temperature: Program the kiln to the desired cone setting.
- Venting: Keep the kiln vent open for the first few hours to allow any remaining moisture to escape.
- Monitoring: Keep an eye on the kiln during the firing process, although most modern kilns are automated and will shut off once the desired temperature is reached.
Considerations
- Kiln Furniture: Use kiln shelves and posts to maximize space and ensure even heating.
- Oxidation vs Reduction: Bisque is usually done in an oxidation atmosphere, meaning there’s plenty of oxygen in the kiln to react with the materials in the clay.
By ensuring your clay is bone dry and understanding the intricacies of bisque firing, you’re setting the stage for a successful final product. This step transforms your crafted clay piece into a ceramic object that’s ready for glazing and the final firing.
Step 7: Glazing
The glazing process is where your pottery piece gets its final appearance, texture, and color. It’s a crucial step that requires attention to detail. Here’s what you need to know:
Applying Glaze or Underglaze After Bisque Firing
Importance
- Final Appearance: The glaze gives your piece its color, texture, and sheen.
- Sealing: Glaze acts as a sealant, making your piece waterproof and more durable.
Types of Glazes
- Glaze: Traditional glazes that come in various finishes like matte, glossy, and satin.
- Underglaze: Used for detailed work and usually applied before the glaze.
Methods of Application
Dipping
- What It Is: Immersing the piece into a bucket of glaze.
- Best For: Quick and even coverage.
- Tips: Stir the glaze well before dipping and shake off excess glaze.
Spraying
- What It Is: Using a spray gun to apply the glaze.
- Best For: Large pieces and achieving gradient effects.
- Tips: Wear a mask to avoid inhaling the glaze particles.
Brushing
- What It Is: Using brushes to apply the glaze.
- Best For: Detailed work and specific designs.
- Tips: Use various brush sizes for different effects.
Pouring
- What It Is: Pouring glaze over the piece.
- Best For: Covering the inside of hollow pieces like bowls.
- Tips: Rotate the piece to ensure even coverage.
Steps for Glazing
- Preparation: Clean the bisque-fired piece with a damp sponge to remove any dust.
- Application: Choose your method and apply the glaze or underglaze.
- Drying: Allow the glaze to dry completely before the final firing.
- Inspection: Check for any missed spots or drips and correct them.
Considerations
- Test Tiles: Always test your glazes on test tiles before applying them to your final piece.
- Multiple Coats: Some glazes require multiple coats, so read the manufacturer’s instructions carefully.
- Safety: Always work in a well-ventilated area and wear appropriate safety gear, especially when spraying glazes.
Glazing is both an art and a science, requiring a good understanding of materials and techniques. It’s the step that brings your piece to life, making it both beautiful and functional.
Step 8: Glaze Firing
The final stage in the pottery-making process, glaze firing transforms your glazed piece into a finished work of art. This step solidifies the glaze, enhancing the piece’s durability and visual appeal. Here’s a deep dive into this crucial phase:
Loading the Glazed Pottery into the Kiln
Importance
- Final Transformation: This is the step where the glaze melts and fuses to the clay, giving the piece its final appearance and texture.
- Spacing: Ensure that the pieces do not touch each other to avoid sticking during the firing.
How to Load
- Kiln Shelves: Use kiln shelves and stilts to maximize space and ensure even heating.
- Orientation: Place your pieces in a way that allows for optimal heat circulation.
Temperature Ranges for Glaze Firing
Factors Affecting Temperature
- Type of Clay: Different clays require different firing temperatures.
- Type of Glaze: The glaze’s composition also dictates the required firing temperature.
Typical Temperature Ranges
- Earthenware: Usually fires at lower temperatures, around 1828°F (1000°C).
- Stoneware: Requires higher temperatures, often between 2150°F (1177°C) and 2264°F (1240°C).
- Porcelain: Fires at the highest temperatures, up to 2345°F (1285°C).
Steps for Glaze Firing
- Preparation: Make sure the glaze is completely dry before loading the kiln.
- Temperature Setting: Program the kiln based on the type of clay and glaze you’re using.
- Monitoring: Keep an eye on the kiln, although most modern kilns are automated and will shut off once the desired temperature is reached.
- Cooling: Allow the kiln to cool down completely before unloading your pieces.
Considerations
- Cone Packs: Use cone packs to monitor the heat work in the kiln.
- Venting: Some kilns require venting at the beginning of the firing to release any remaining chemical water from the glaze.
- Safety: Always follow safety guidelines, including using heat-resistant gloves when loading and unloading the kiln.
Additional Tips
While the steps in pottery-making are crucial, there are additional tips that can make your experience smoother and more rewarding. Here are some noteworthy ones:
Recycle Your Clay If You Make a Mistake
Importance
- Sustainability: Clay is a natural resource, and recycling it is an eco-friendly practice.
- Cost-Effectiveness: Clay can be expensive, so recycling helps you save money.
How to Recycle
- Collect Scraps: Keep all your clay scraps and trimmings.
- Drying: Spread the scraps on a flat surface and let them dry completely.
- Rehydration: Soak the dried clay in water until it becomes pliable.
- Wedging: Re-wedge the clay to remove air bubbles and achieve a uniform consistency.
Tips
- Storage: Store recycled clay in airtight containers to prevent it from drying out.
- Labeling: Label your recycled clay containers with the type of clay and its firing temperature for future reference.
Ensure the Clay is Bone Dry Before Firing
Importance
- Preventing Cracks: Firing damp clay can lead to cracks or even explosions in the kiln.
- Quality: Ensuring the clay is bone dry contributes to the quality of the final piece.
How to Ensure Bone Dryness
- Visual Inspection: The clay should appear lighter in color.
- Touch Test: The clay should not feel cold or damp to the touch.
- Weight: Bone-dry clay is significantly lighter than wet clay.
Tips
- Slow Drying: Allow your piece to dry slowly to prevent warping and cracking.
- Even Drying: Rotate your piece during the drying process to ensure it dries evenly.
- Humidity: Be mindful of the humidity in your workspace, as it can affect drying times.
FAQ Section for First Steps in Pottery
What is the difference between ceramic and porcelain, in terms of pottery making?
Ceramic is generally easier to work with and fires at a lower temperature than porcelain. Porcelain is known for its high heat tolerance, smooth texture, and is less malleable compared to ceramic.
Are there any significant human inventions that have impacted modern-day pottery making methods?
Yes, the invention of the potter’s wheel and the development of various types of kilns have revolutionized pottery making. Modern technology has also introduced automated processes and new materials.
Can you tell me something about Chinese porcelain and its importance to modern-day ceramics history?
Chinese porcelain is renowned for its high quality and has influenced ceramics worldwide. It introduced advanced techniques and aesthetic standards that are still followed today.
How do I create a knife edge on a piece of thrown pottery safely and correctly?
To create a knife edge, use a trimming tool when the clay is leather-hard. Hold the tool at a 45-degree angle and gently trim away the excess clay, ensuring even pressure for a smooth edge.
What is the first stage of pottery?
The first stage is choosing your clay type, such as earthenware, stoneware, or porcelain, based on your project needs.
What pottery technique should a beginner start with?
Beginners often find the pinch pot technique to be the easiest. It involves pinching the clay into your desired shape and is a great way to get accustomed to the material.
What are the steps in making ceramics?
The steps include choosing clay, wedging, selecting a technique, shaping, trimming, bisque firing, glazing, and glaze firing.
What is the first step in using clay?
The first step is to wedge the clay to eliminate air bubbles and achieve a uniform consistency and moisture level.
Footnotes
- Basic Pottery Making: All the Skills and Tools You Need to Get Started. United States: Stackpole Books, 2009. ↩︎


